
This is the first in a regular series in which I attempt (operative word) D.I.Y. projects and bring you, dear reader, the results. The good. The bad. And the hideous. I’ll offer step-by-step instructions so that you can D.I.Y. along with me.
In case you haven’t noticed, it’s completely disgusting outside. And cue the sad trombone: It’s going to get worse. Like, in a matter of hours. Maybe you optimistically left the house this morning sans your I-live-in-a-frozen-tundra gear, because the temperature was a balmy 50 degrees. But now you’re checking the forecast and realizing that by the time you leave work, it’s going to be considerably more miserable. Well, if you happen to have two skeins of yarn at your desk, because who doesn’t, boy are you in luck! You’ve got just enough time to churn out a “30-minute arm scarf,” like I did yesterday. Or, in my case, an “hour-and-a-half arm scarf,” which has considerably less of a ring to it.
Now, contrary to what it may sound like, this is not a scarf worn on your arms, though I would absolutely wear that. Like leg warmers for your arms? I guess that’d just be sleeves? Anyway. No, in this case, or at least until I trademark Arm Scarves: Scarves You Wear on Your Arms®, an arm scarf is a scarf that you “knit” using the limbs that are attached to your upper body instead of knitting needles. I’ve never knitted in my life, but I consider myself fairly crafty, and I like a challenge. So I found this video tutorial and set to work.
If you want to try one yourself, here’s what you’ll need:
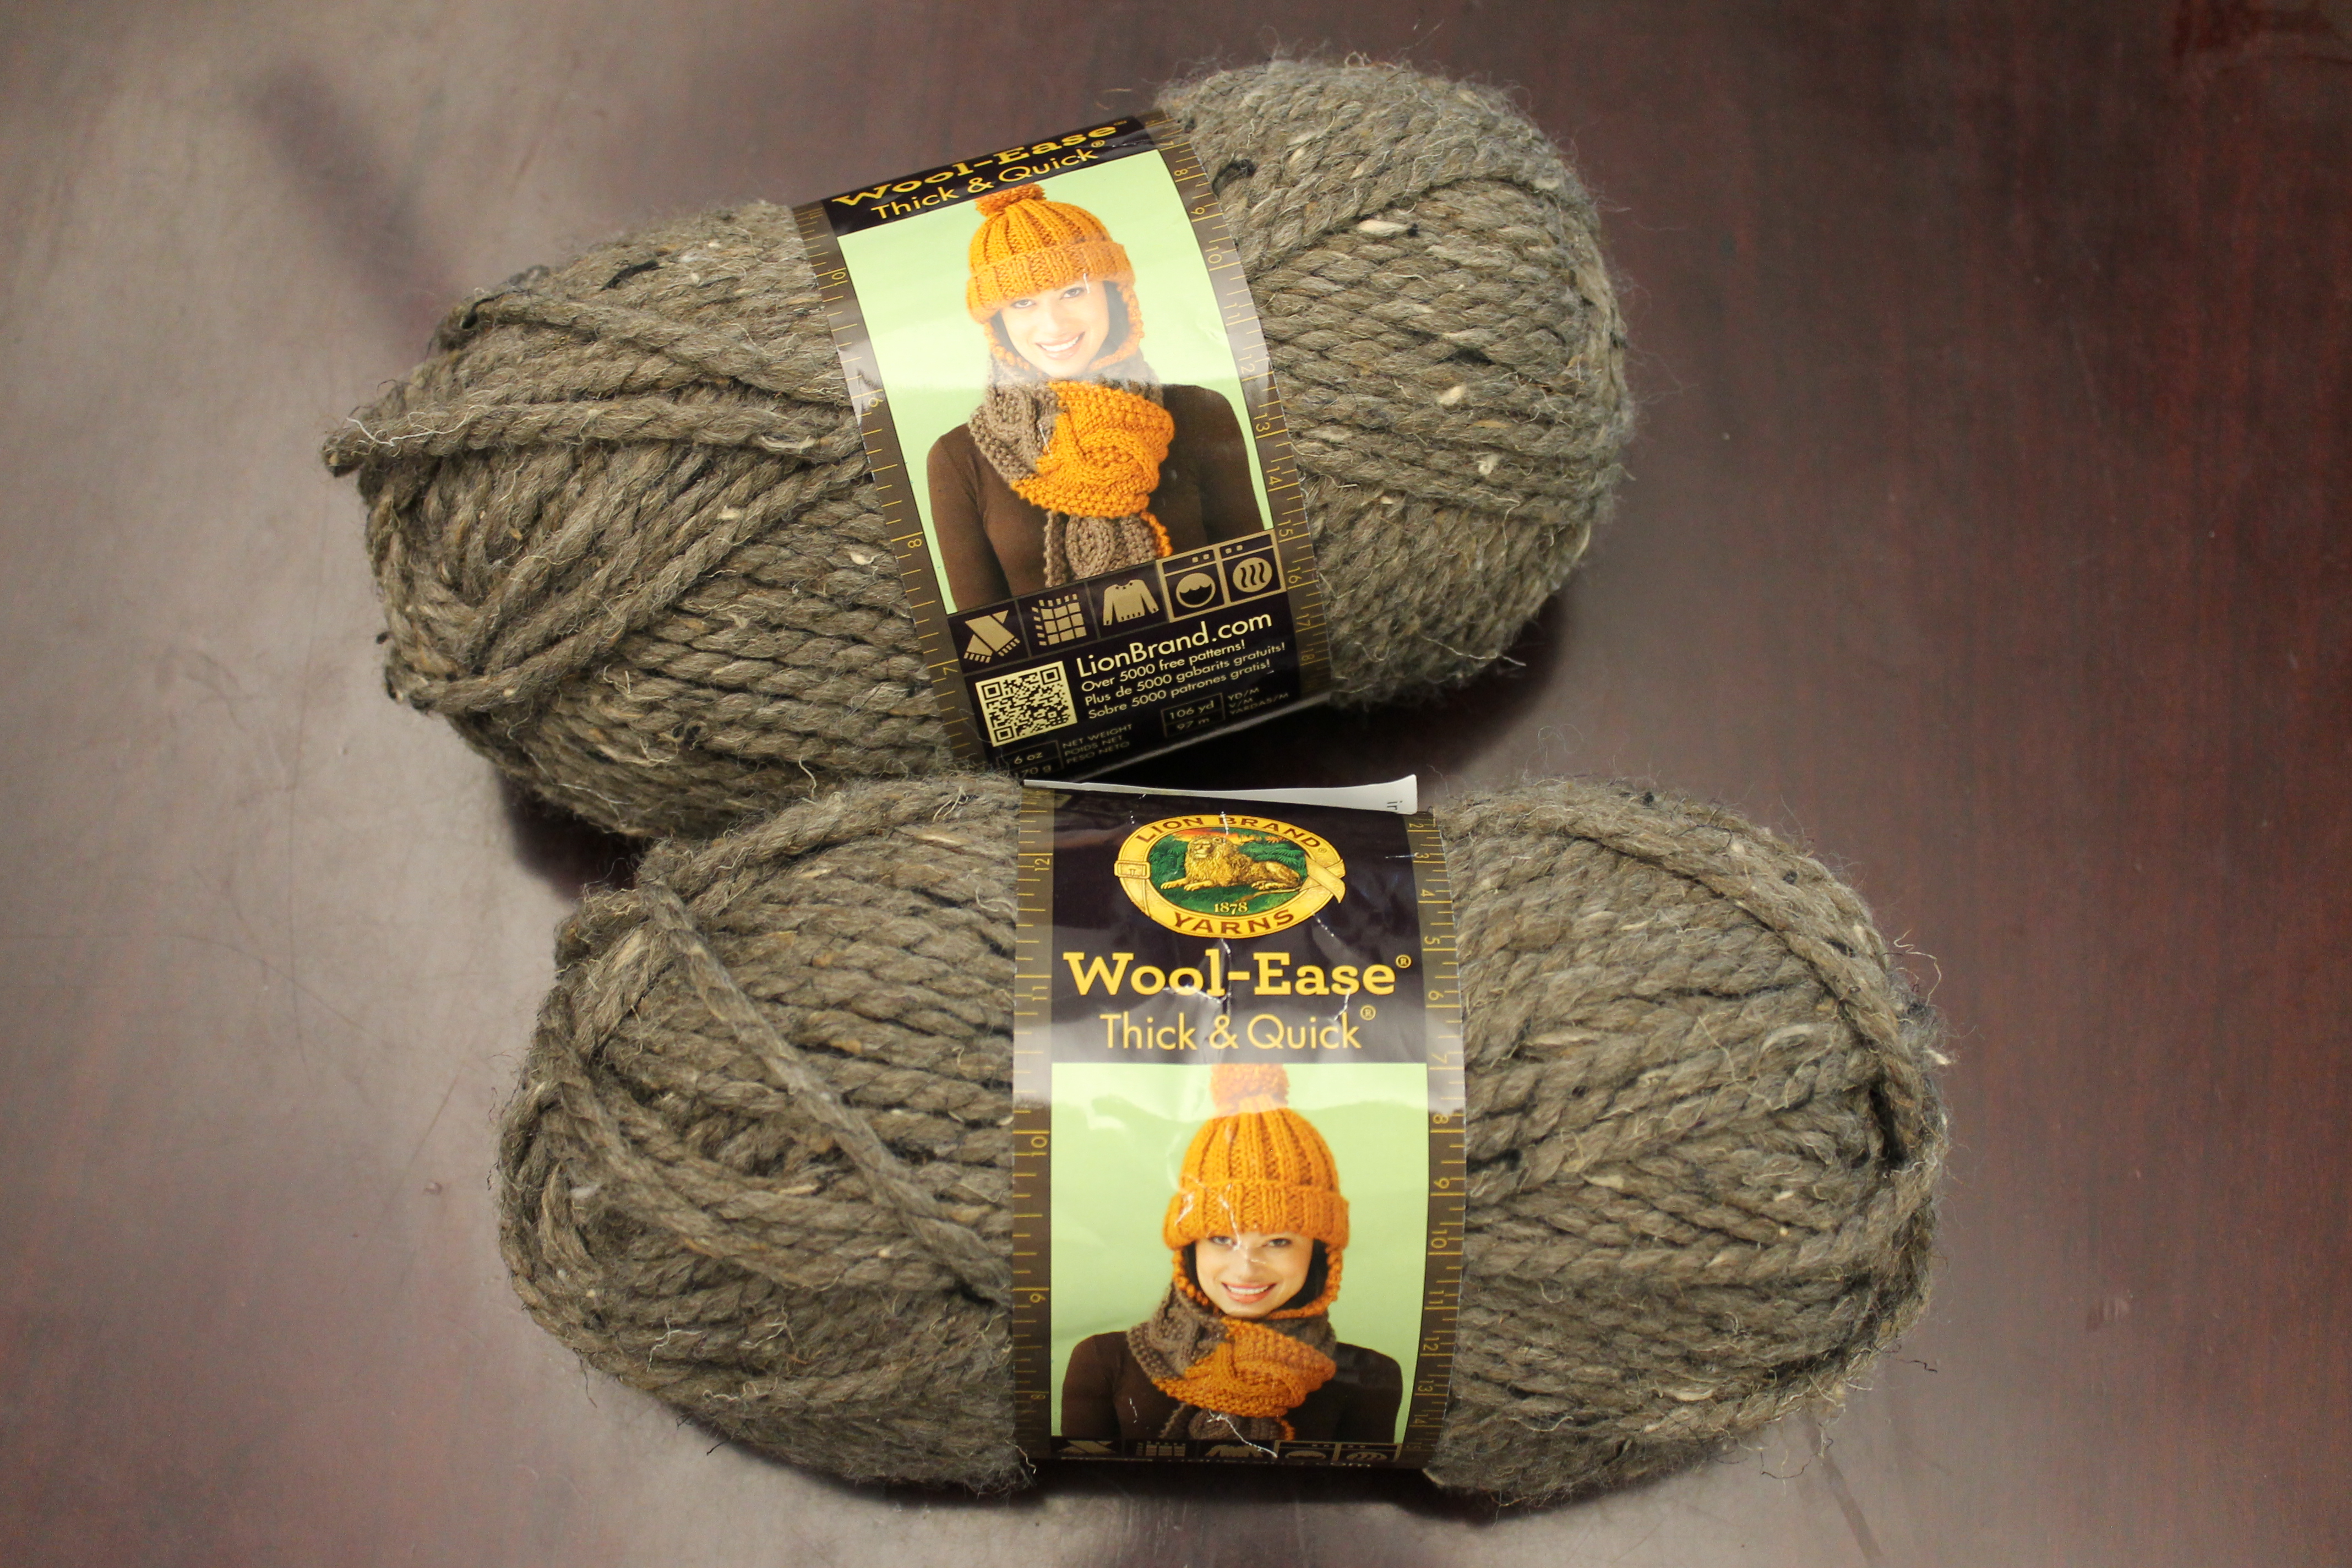
•Two skeins of yarn. (If you don’t have any handy, your local craft store will have an extensive selection. I went with a thick-weight yarn for a fuller effect, but any kind will do.)
•Your arms. (I went with a pale, untoned variety, but again, any kind will do.)
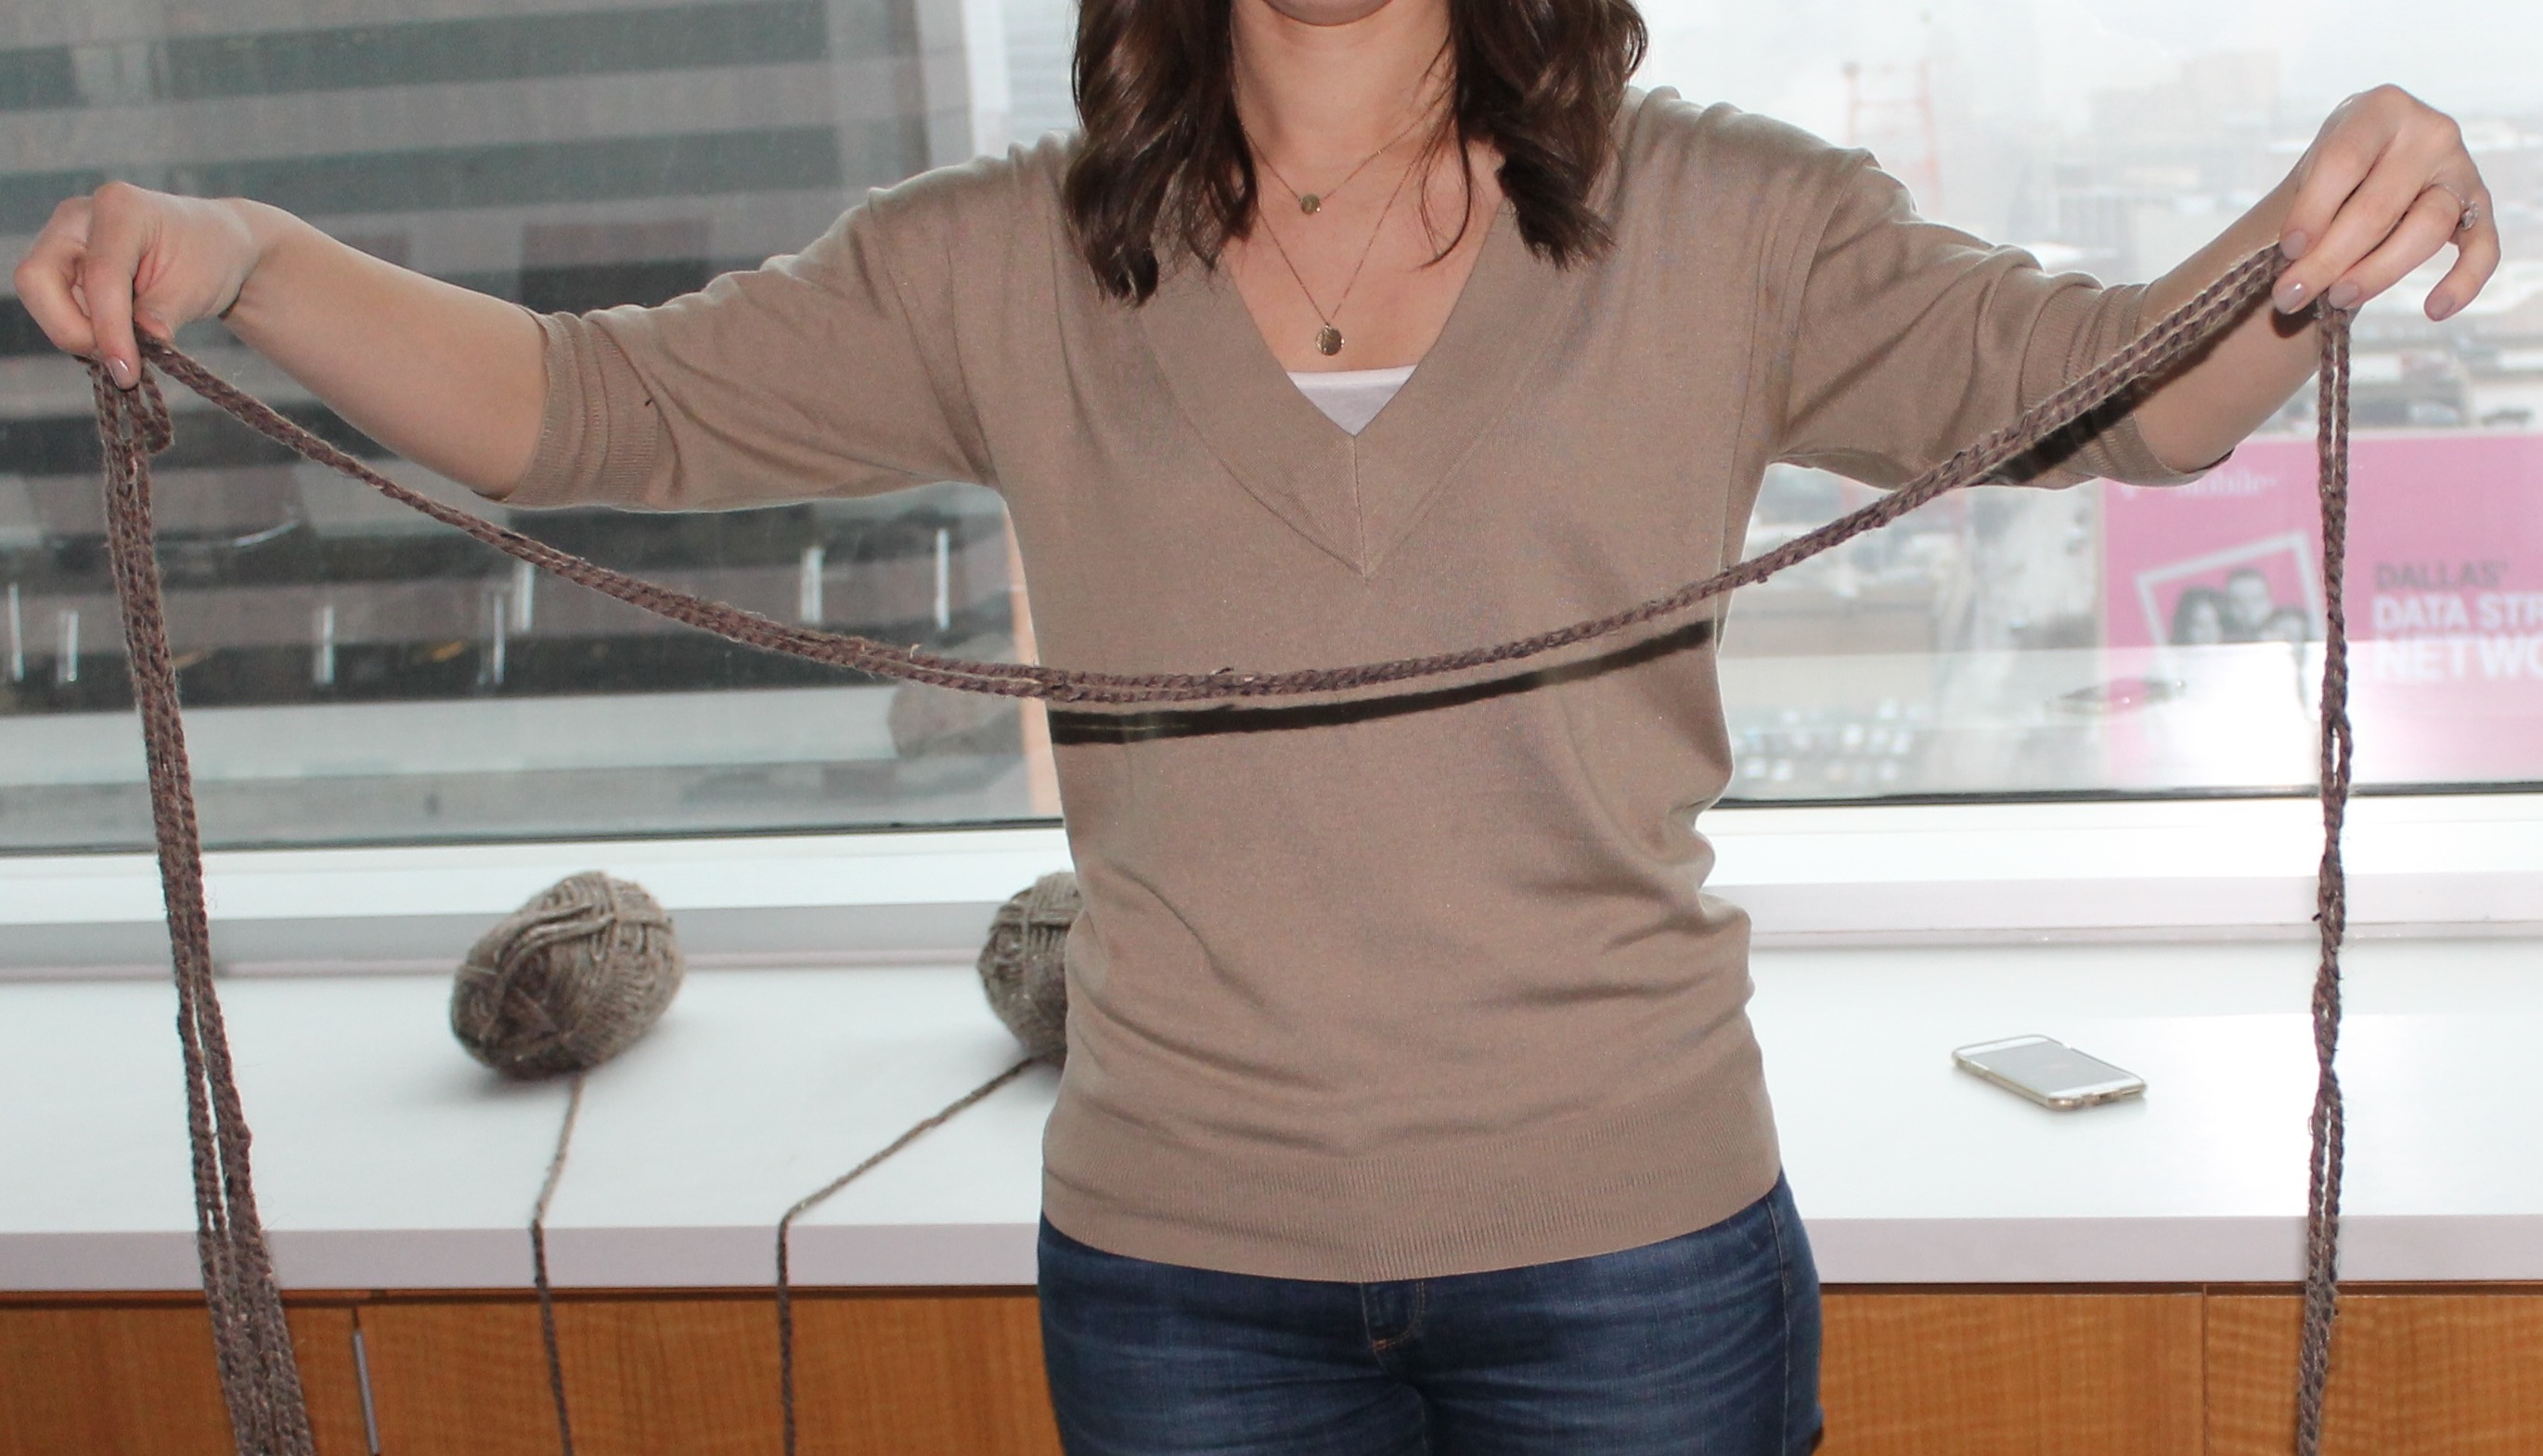
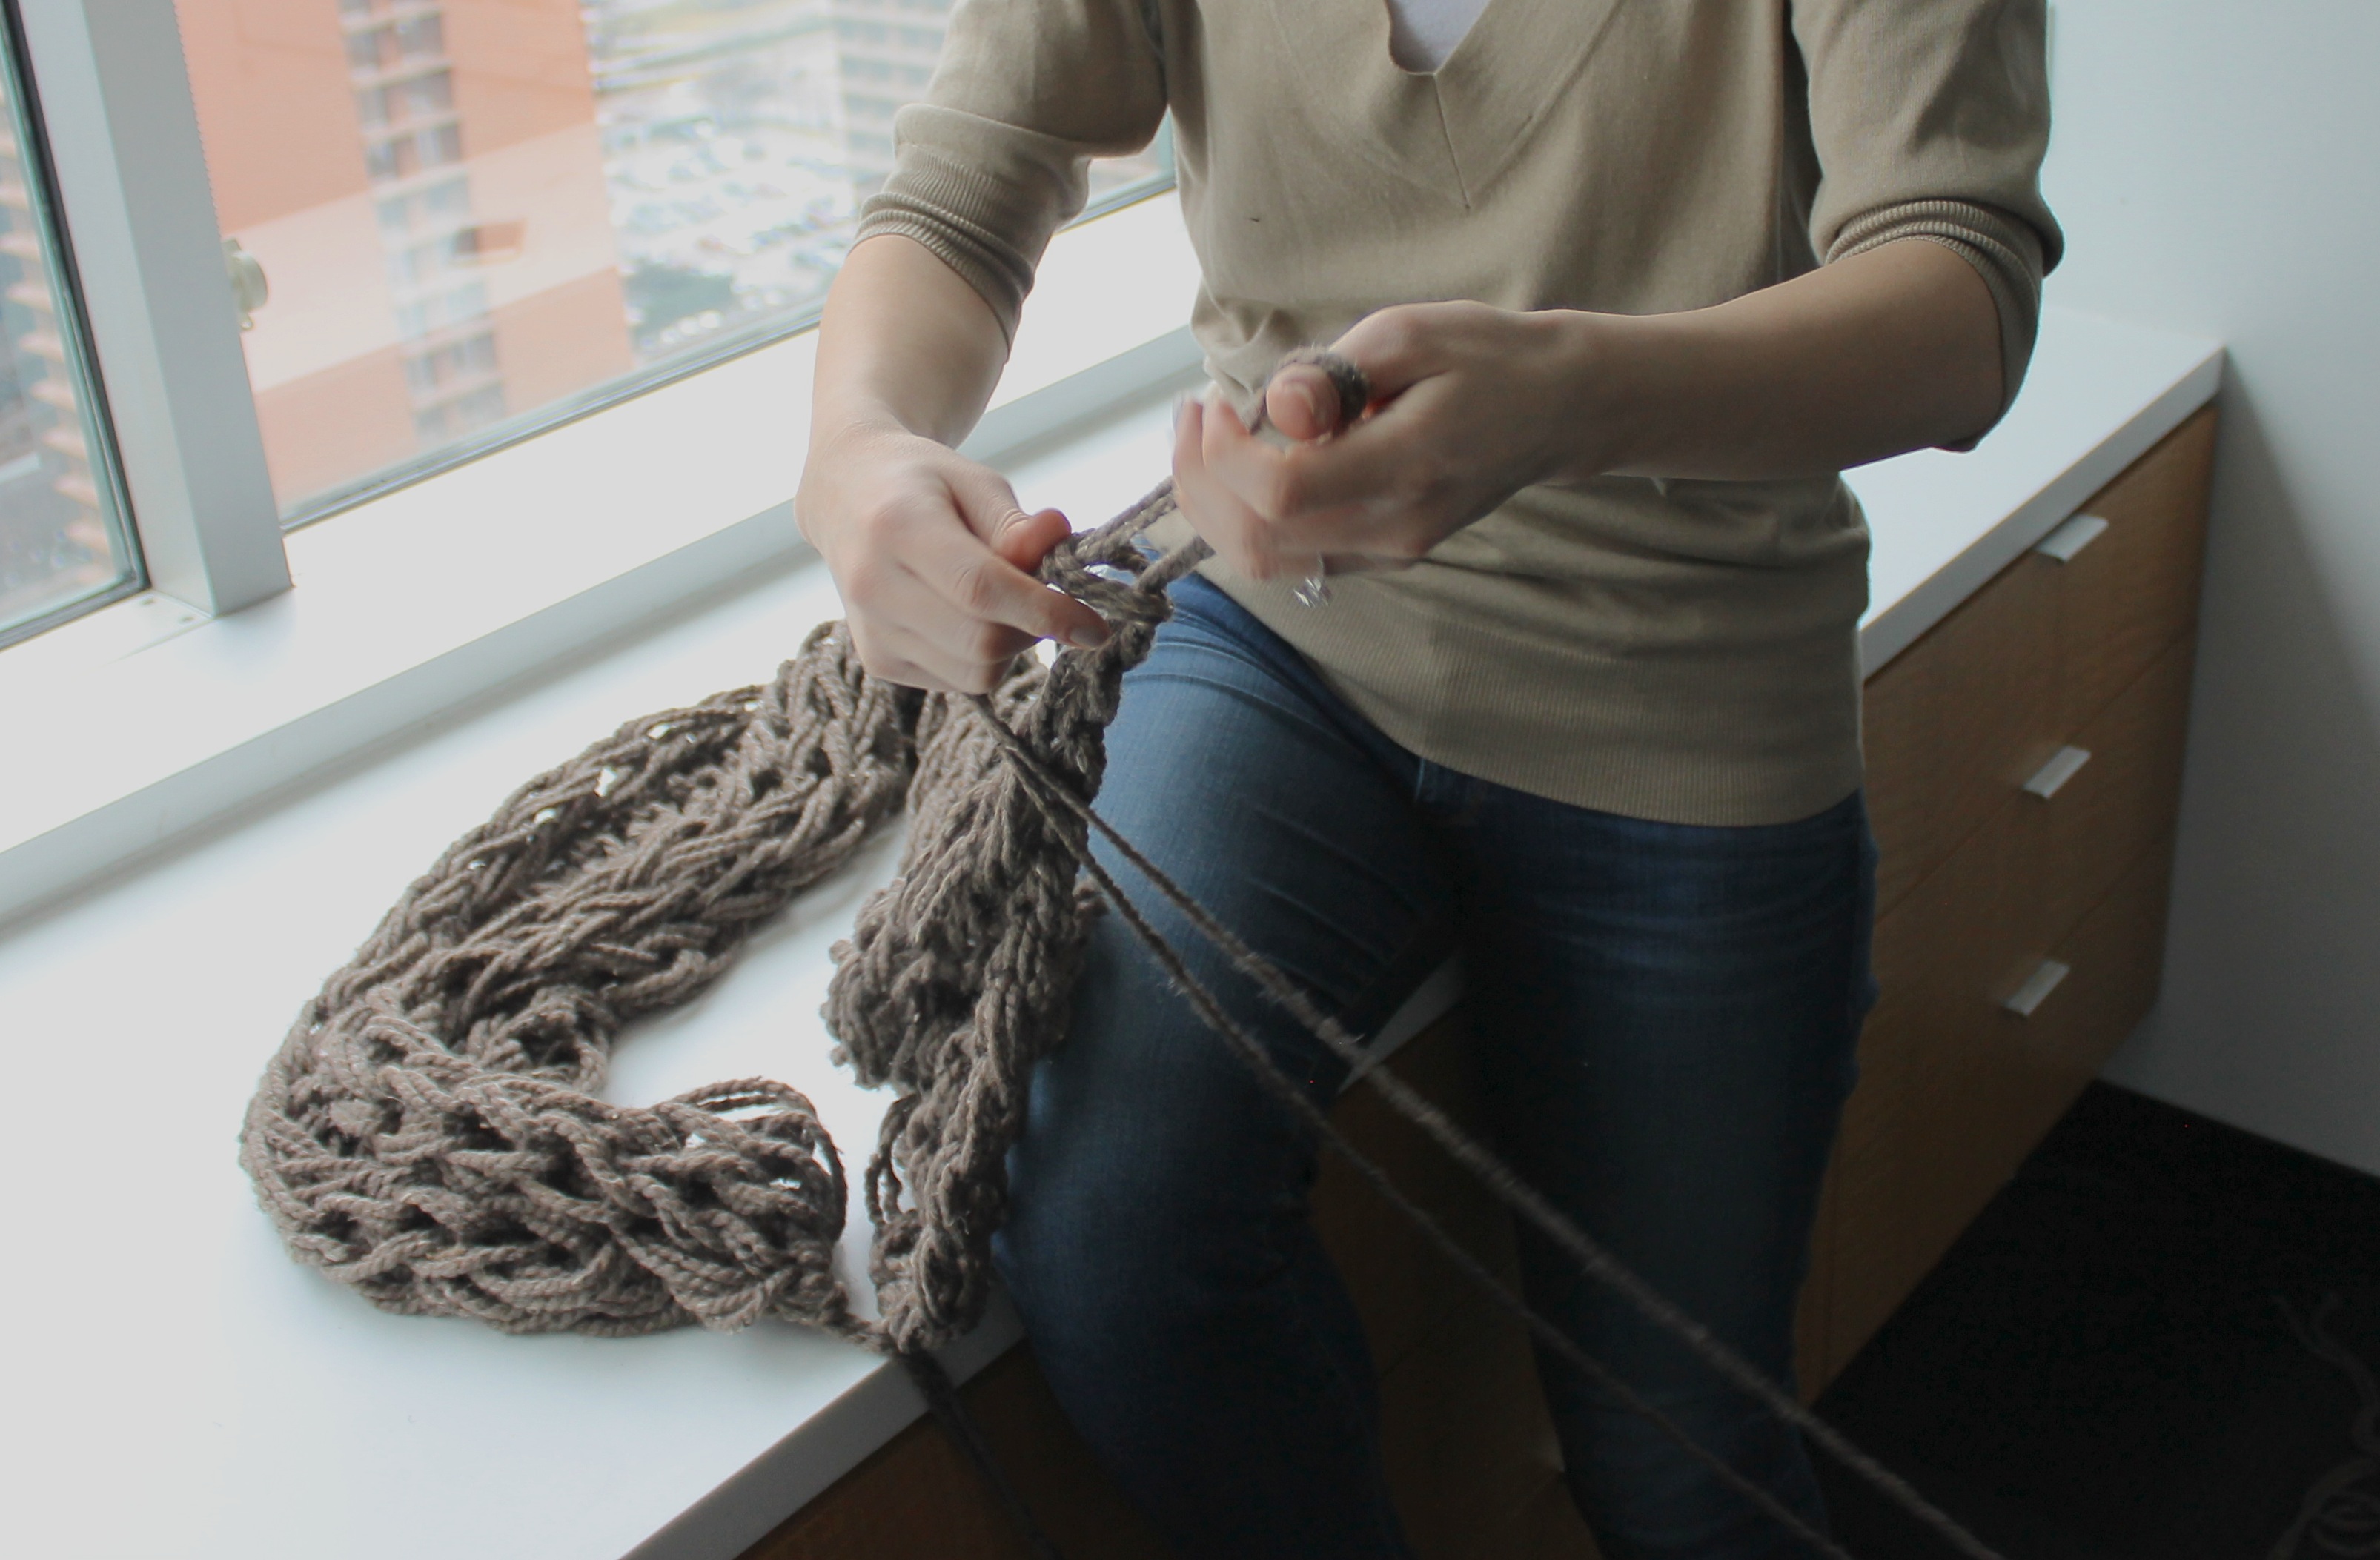
Start by finding the ends of the yarn and pulling out about five feet of length from each skein. This will be your “tail.” Have your phone in the background for no other reason than you are addicted to mobile technology.
Create a slip knot and slide the resulting loop onto your right forearm. The yarn opposite the tail is your “working yarn.” (This is probably a good point in the post to introduce an accompanying drinking game: Take a shot every time I use the word yarn. By the end of this post, you’ll have alcohol poisoning and, likely, one sloppily constructed infinity scarf.)
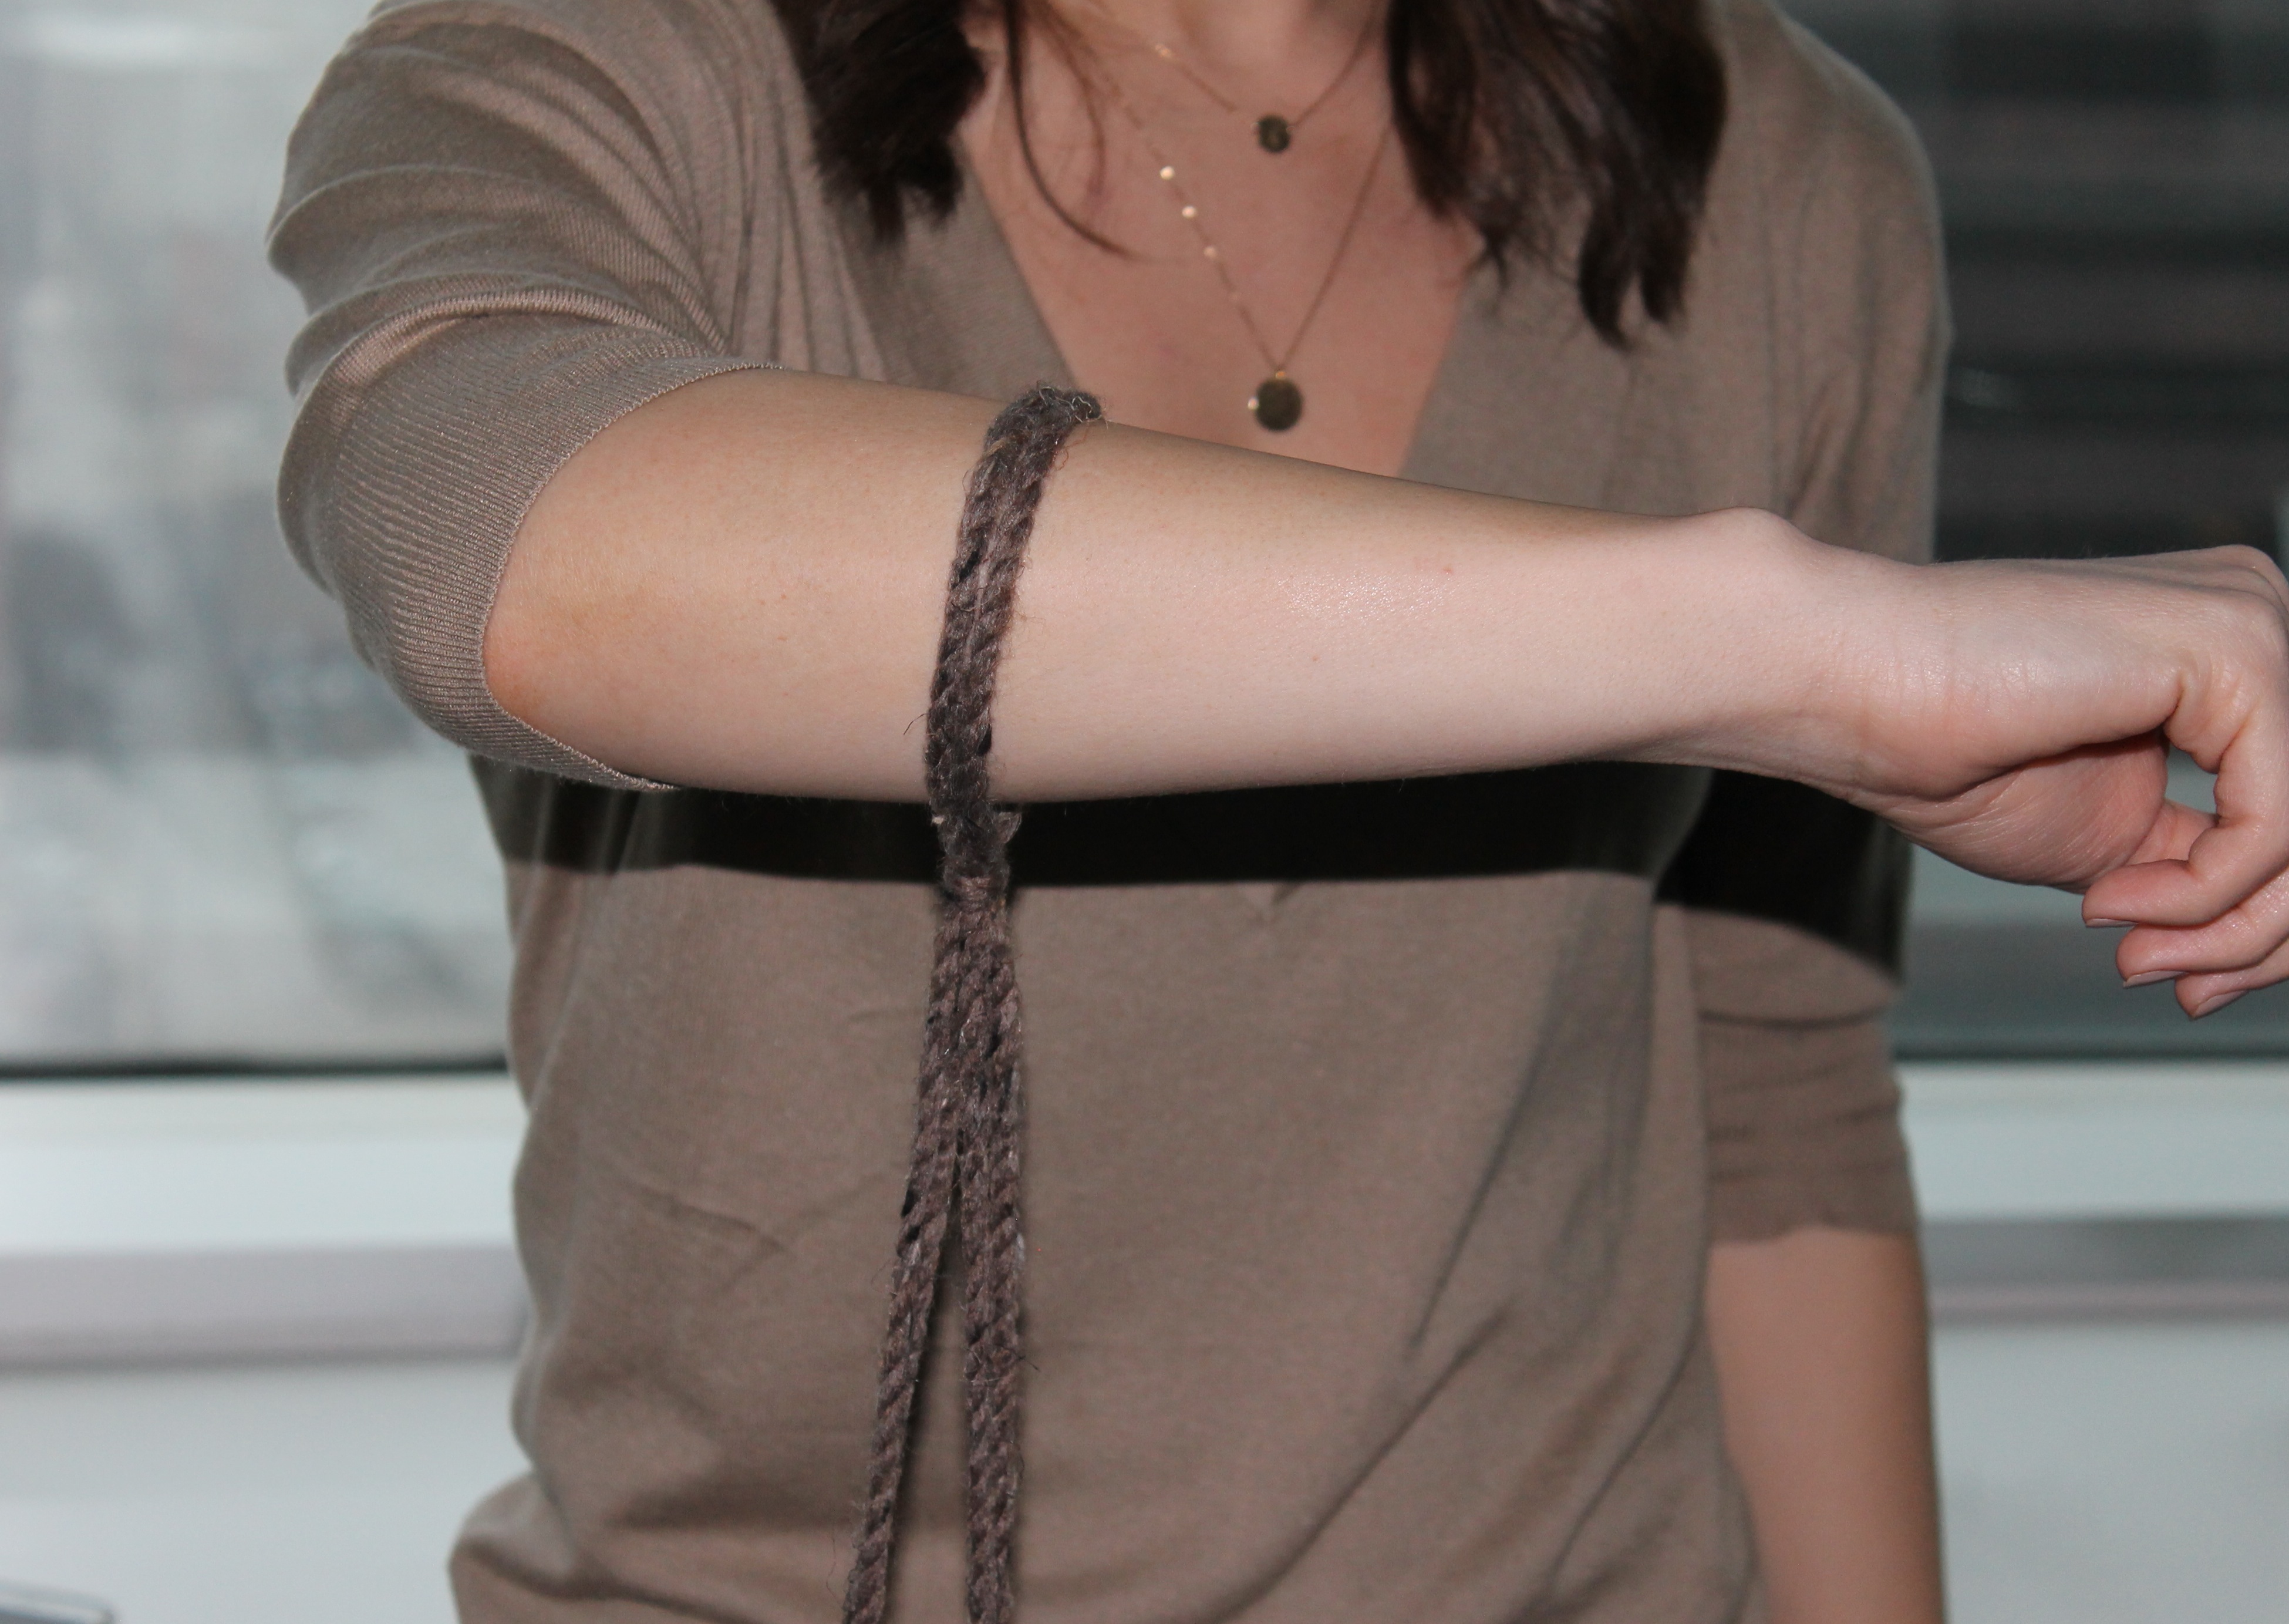
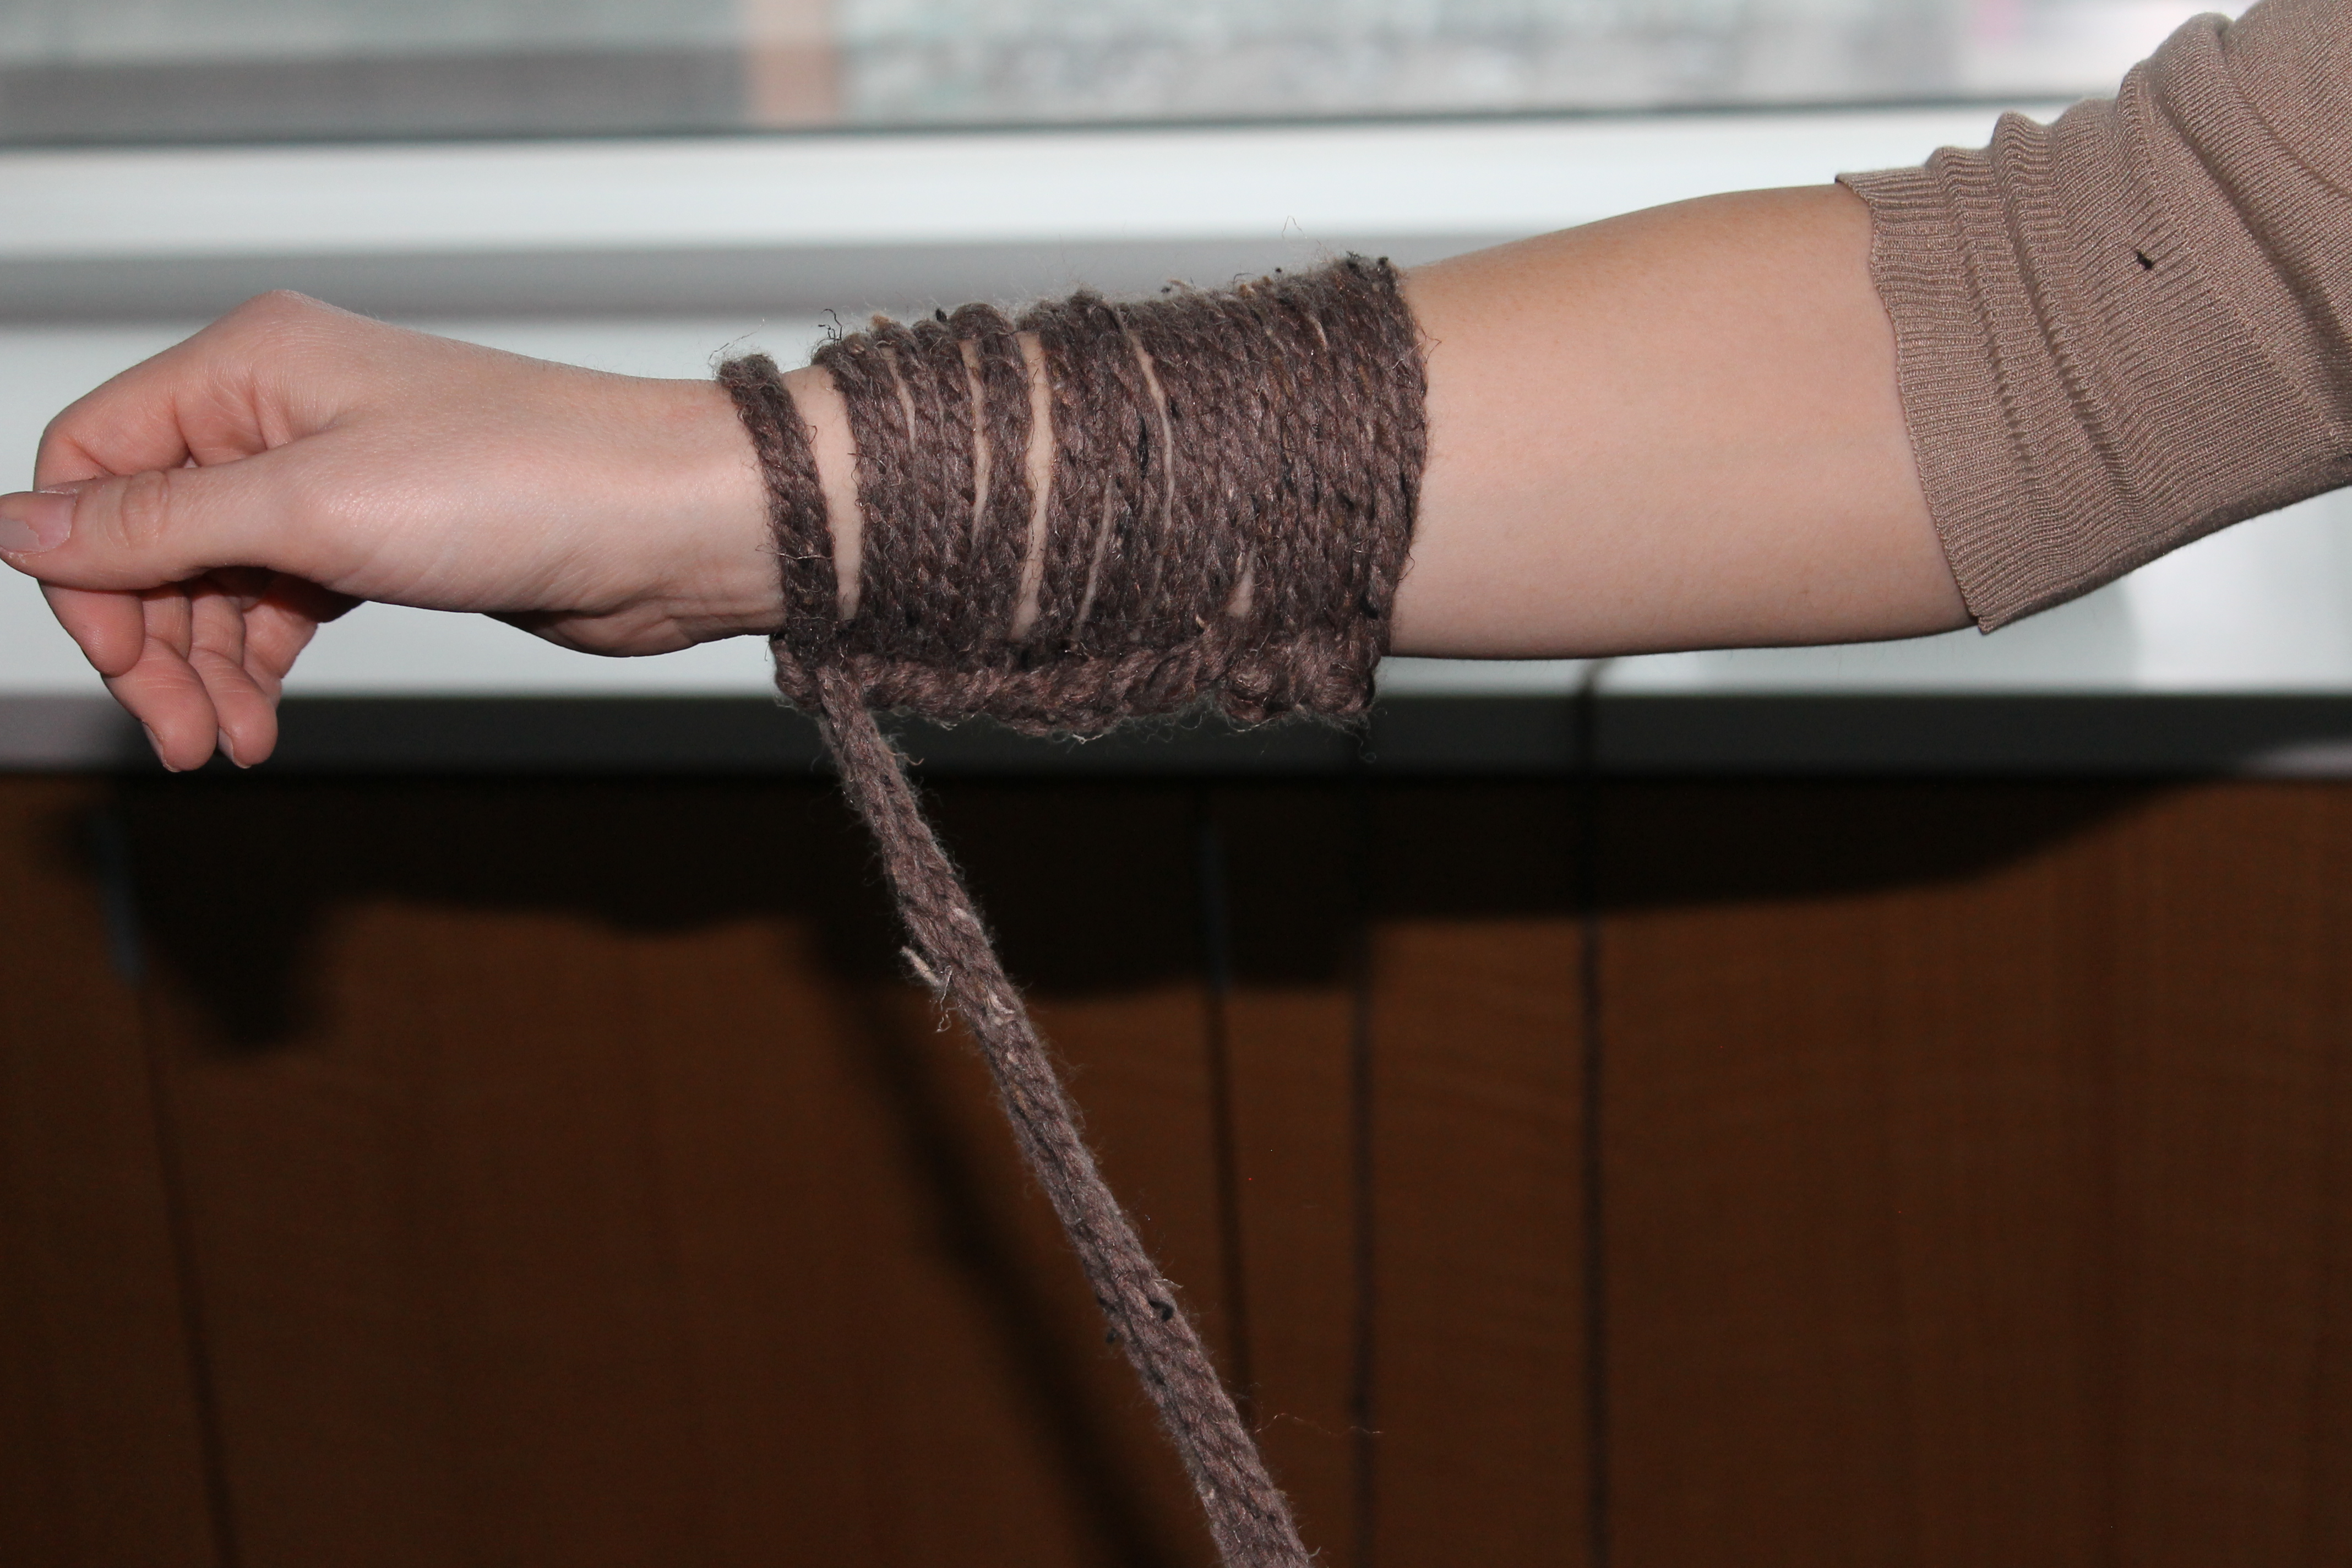
Place your left thumb and forefinger between the tail and the working yarn, then grip the ends with your other fingers. Flip your hand outward so the the tail is looped around your thumb and the working yarn around your forefinger. It will look kind of like that cat’s cradle game you used to play as a kid. Except now you’re an adult and you’re making your own scarves out of yarn in your office conference room and you realize your life didn’t turn out quite like you thought it would.
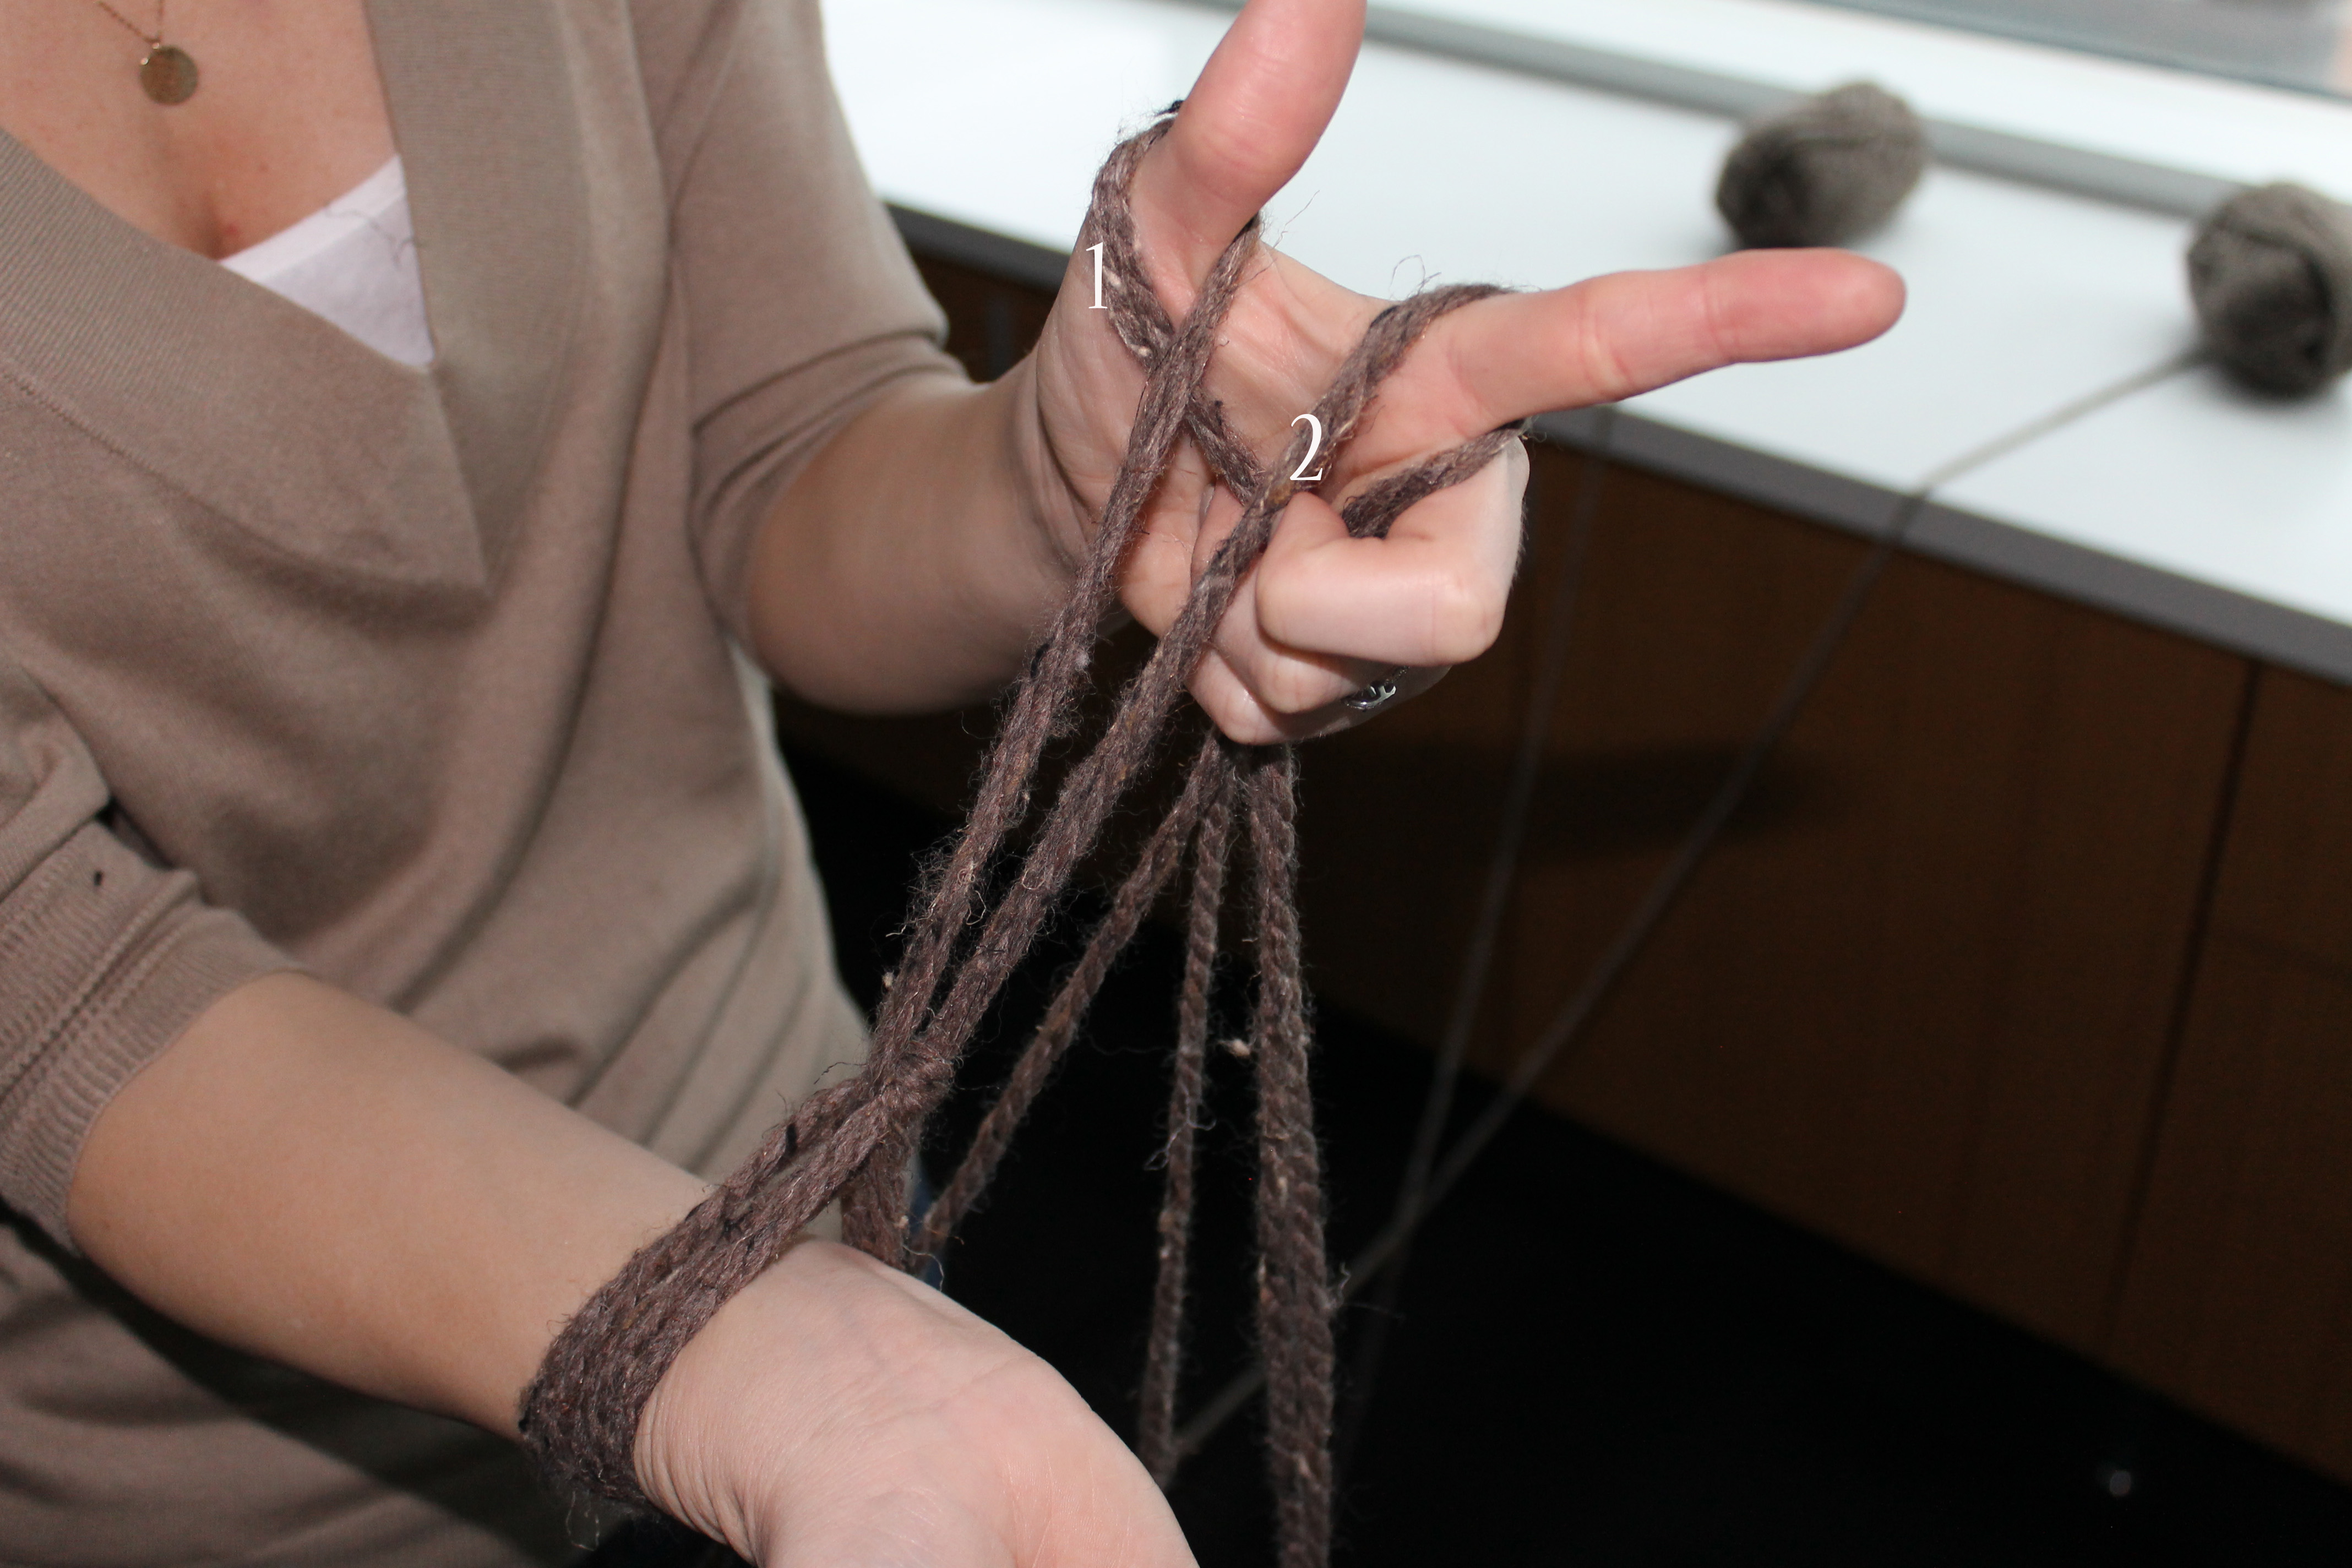
Slip your right hand under the yarn I’ve conveniently marked as “1” in the above photo. Then, thread your hand up and over the strands labeled “2,” then through, releasing the yarn with your other hand. Pull the yarn so it tightens around your arm. You’ve just created your first stitch. Now here’s the part of the segment where I throw a few ingredients in a bowl, stir twice, and pull a perfectly rolled sheet of dough from below the counter in the interest of saving time: Repeat that step until you have 12 stitches on your forearm.
All done? Great. At this point, you’ll want to finish any hilarious, half-composed tweets you’ve been workshopping, make sure there aren’t any muggers around that would require you to engage in self-defense, and chug enough fluid to satisfy your human need for hydration for at least the next 30 minutes, because here’s when your left arm gets involved. You’ll basically be wearing really soft handcuffs for the remainder of your scarf-making journey, or until you say “Alright, I’ve had enough of this little experiment” and break free from your shackles of spun wool. I just want you to be adequately prepared, is what I’m saying.
Hold the working yarn with right hand. With your left hand, slip the last stitch of yarn (the one closest to your wrist) off your arm, then pull the working yarn up and through that loop. Slip your left hand through the gap between the working yarn and the stitch. Pull the working yarn tight with your right hand so that now there is a stitch on your left arm. It will look sort of messy at first, and you’ll feel like you’re just transferring a series of stitches from arm to arm. But I promise, something magical is starting to happen (if you have a low standard for what constitutes “magic”).
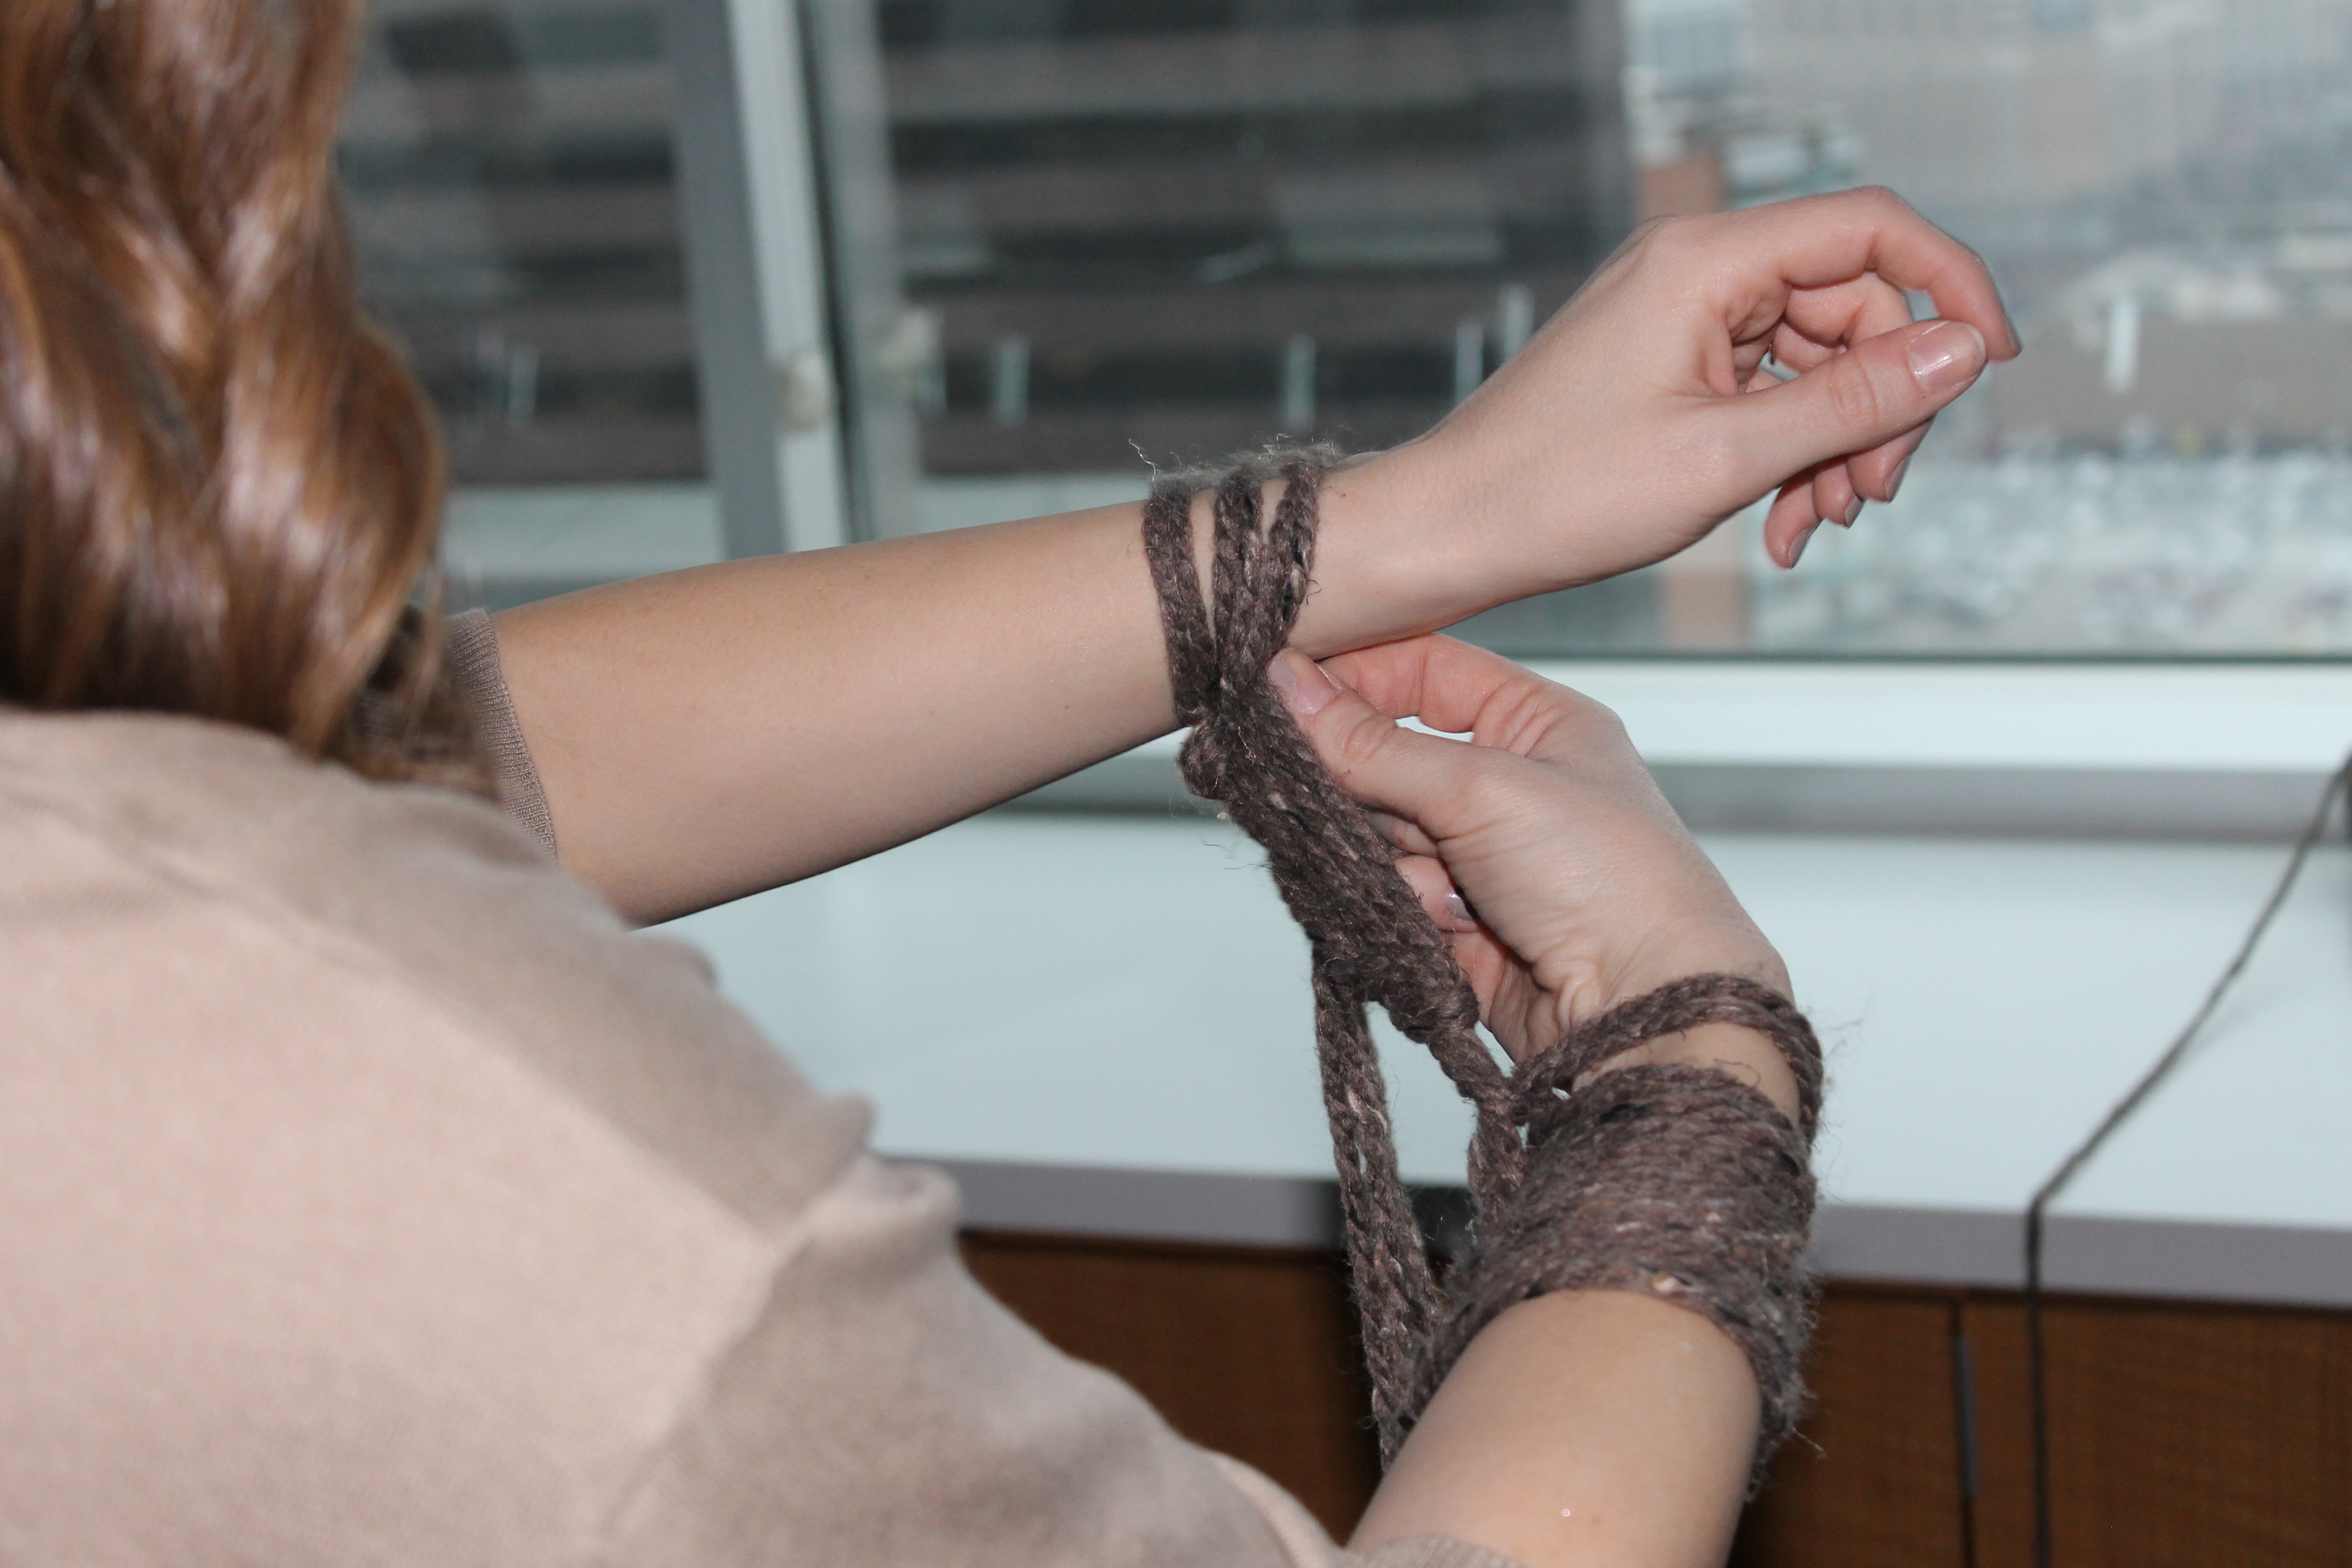
Repeat this step until all the stitches have been removed from your right arm. [**Pulls a baked pie crust from below the counter.**] You should have what looks like Crazy Hairy Rob Lowe’s arm curtains.

Believe it or not, you’ve basically learned everything you’ll need to know to complete your scarf. K, bye!
Just kidding. About the leaving, not about the basically knowing everything part. You really do pretty much know all you have to know. You’ll simply repeat the process on alternating arms until you’ve created enough layers to reach the length of scarf you want. I will warn you that I was convinced I’d ruined the scarf upon removing the first stitch from my hand immediately following the above photo. If this happens to you, don’t freak out. You did not undo all of your hard work. Well, maybe you did, I can’t see what sort of mess you’re creating over there. But most likely, you do not need to completely lose faith in yourself and unravel everything and start over, cursing your sub-par crafting/life abilities all the while (like a friend of a friend of mine that I heard about once). The first loop or two will look weird and unstable. Keep going. Before you know it [**here comes that completely finished pie from under the counter**], it will look like this:
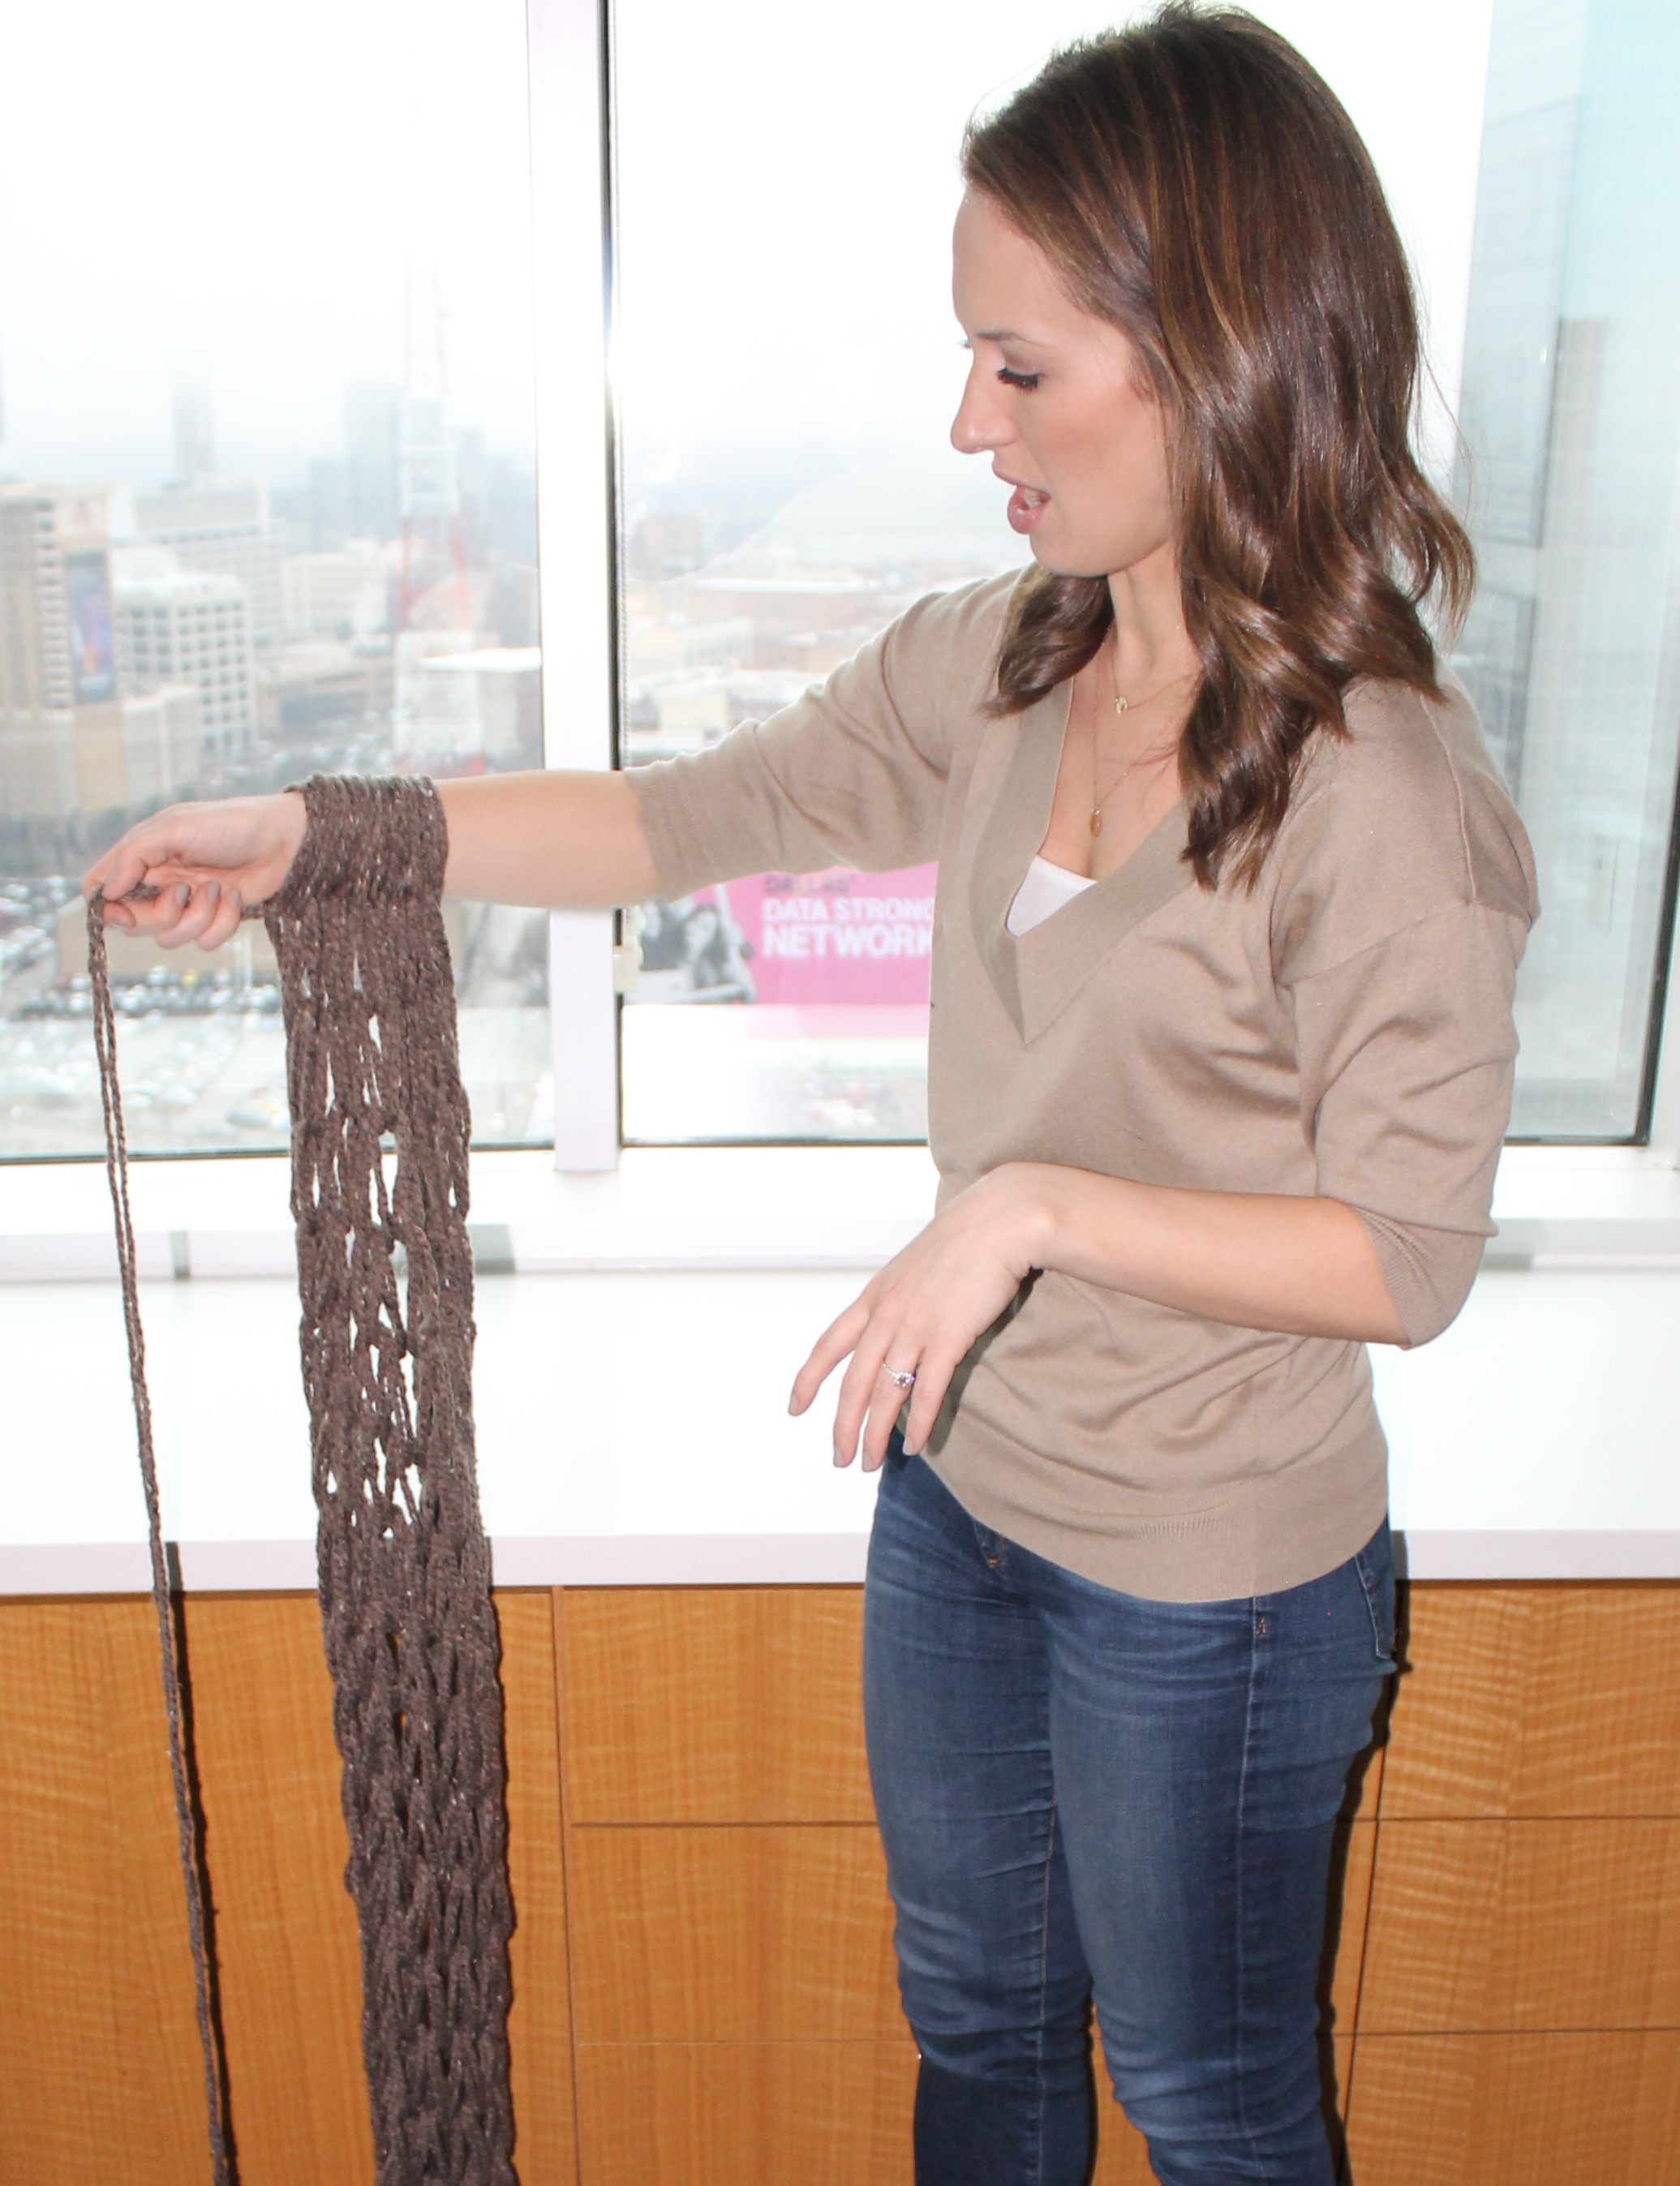
I know! Even I can’t believe it. You can tell, because of the “I can’t believe it” face I’m making.
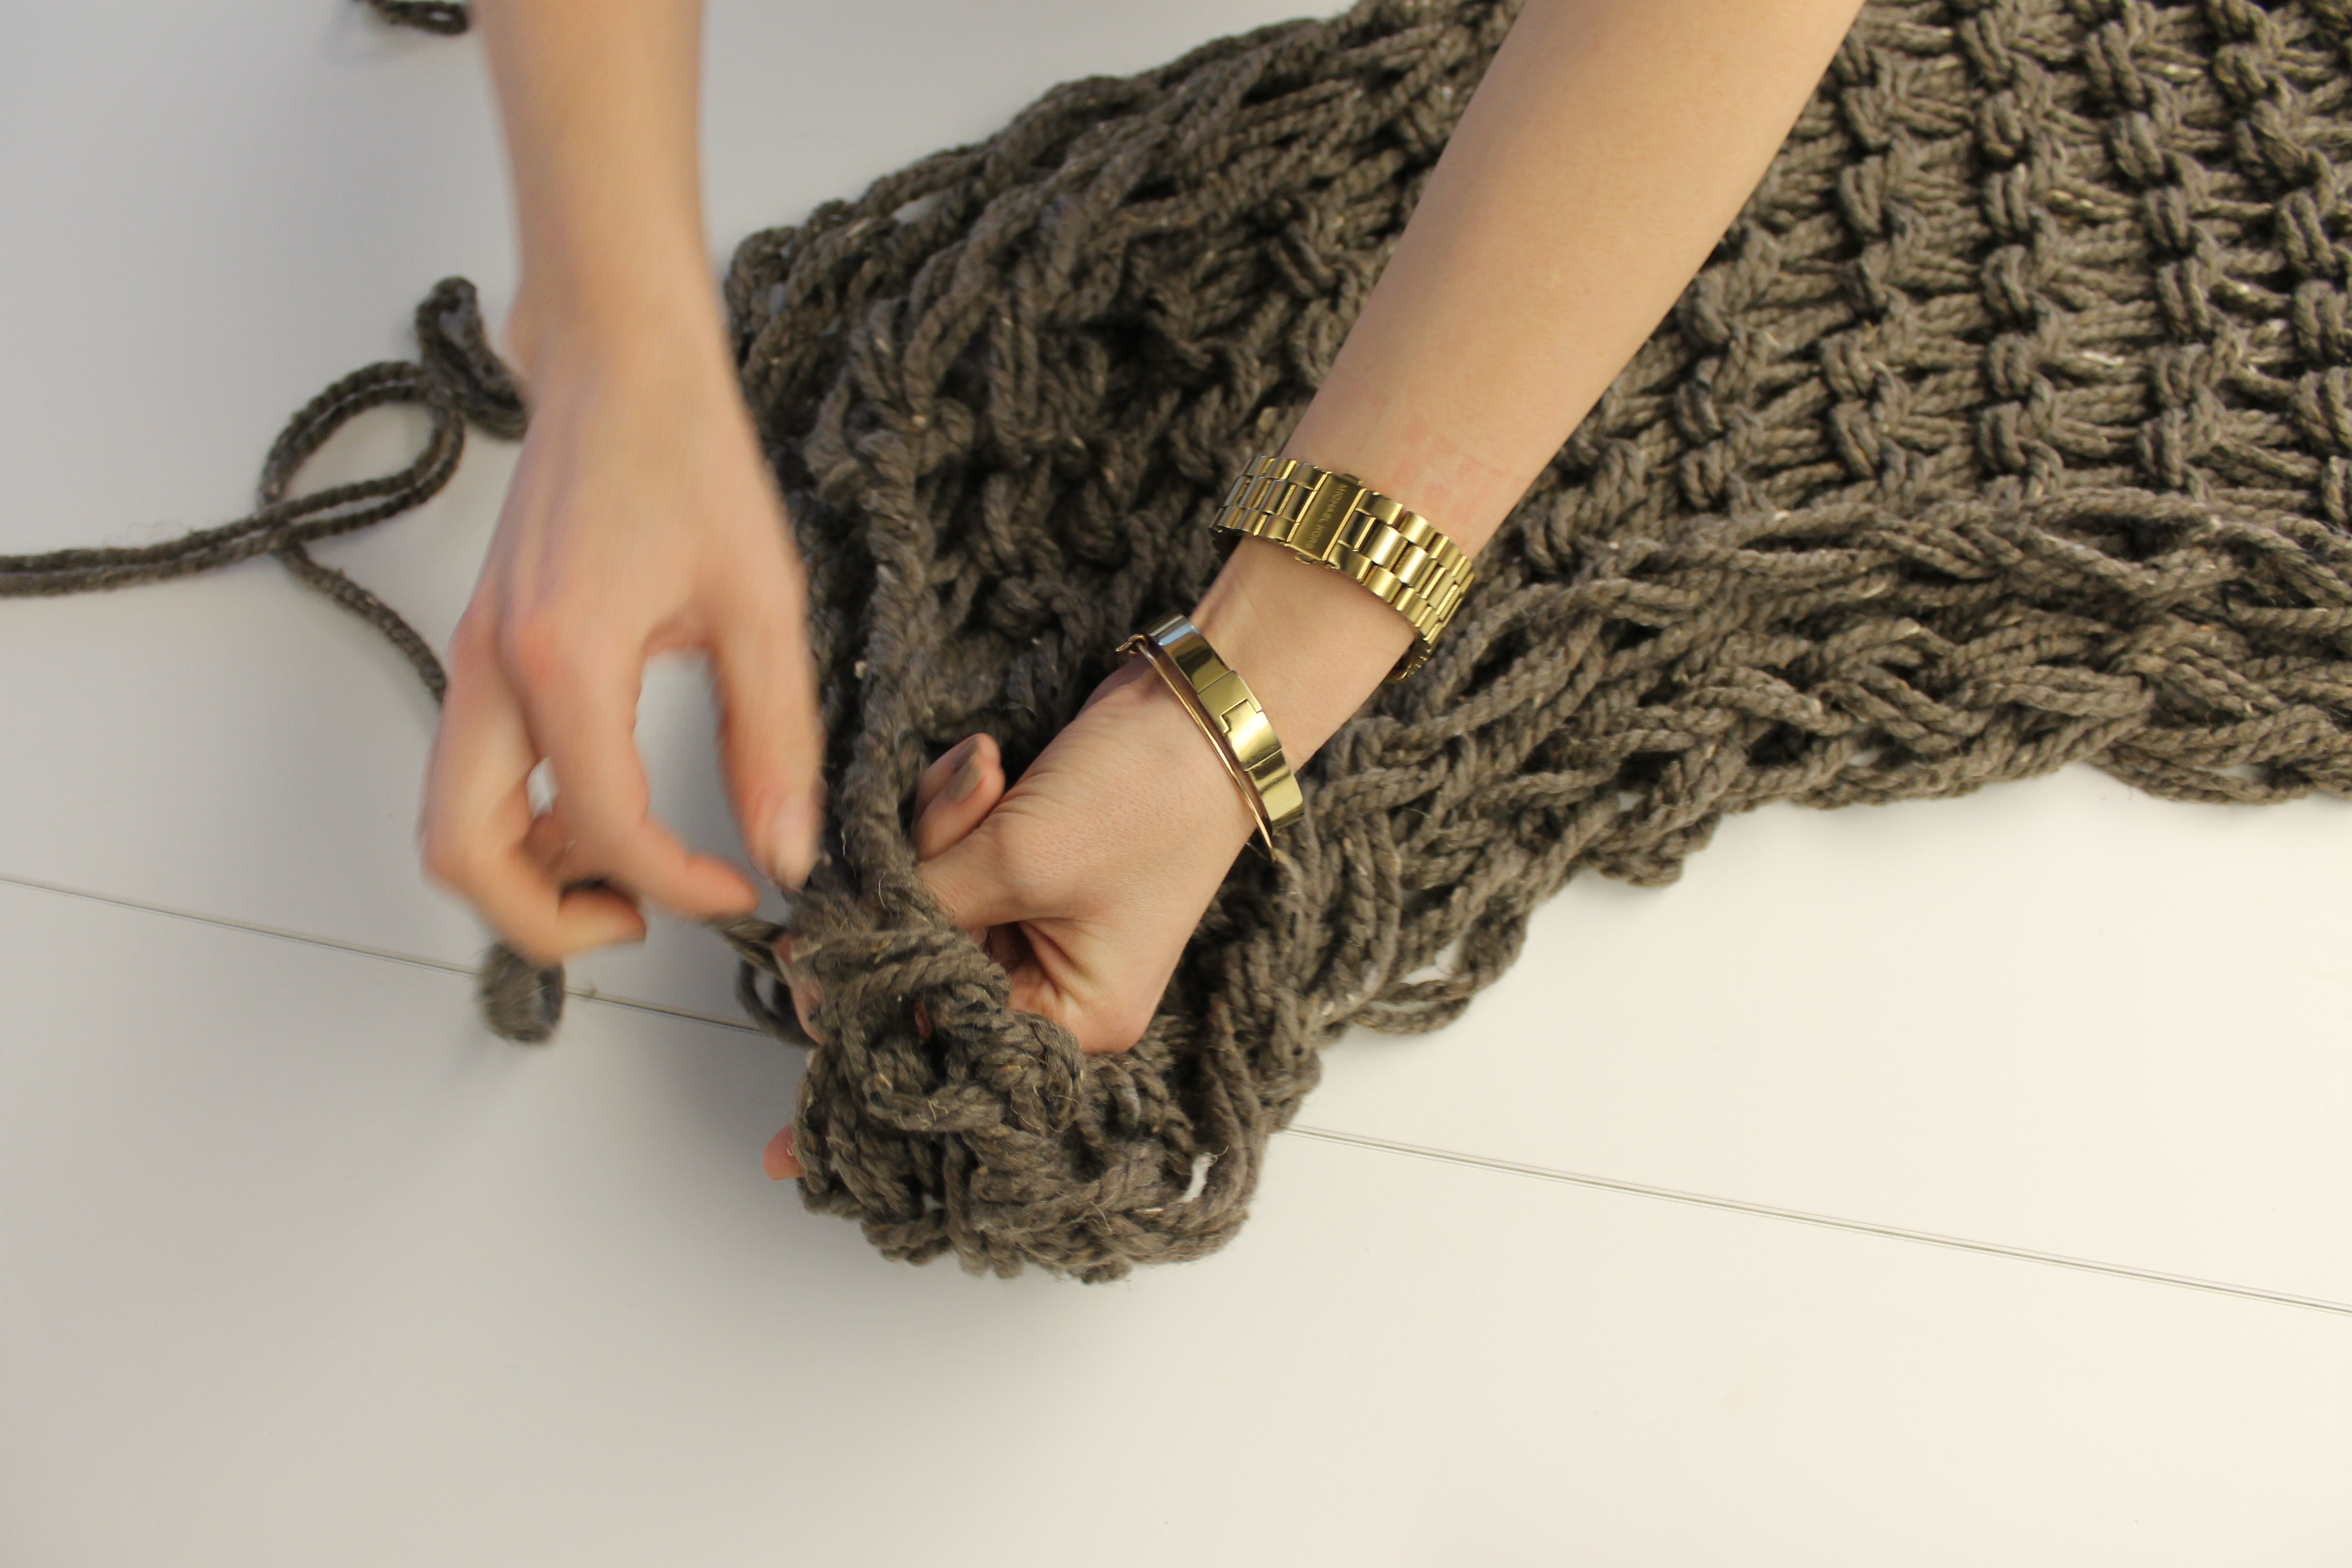
Once you’ve reached your desired length, you’ll need to tie off the end of the scarf. To do this, repeat the process from above with the first two stitches, transferring them onto your other arm using the same technique of pulling the working yarn through the stitch, slipping your hand through, and tightening. Once you have two stitches on your opposite arm, pull the first stitch (the one furthest up your arm) up and over the second stitch and off your hand.
Pull the working yarn to tighten the remaining stitch on your arm. Using the same technique, transfer another stitch onto your arm. Again, pull the first stitch over the second and off your hand. Pull to tighten. Repeat until all but the last stitch have been finished off. With the last stitch, slide it off your hand gently, pinching it at the base so it doesn’t pull all the way through, thus unraveling everything in your life scarf. Pull the working yarn through that loop and tighten, forming a knot.
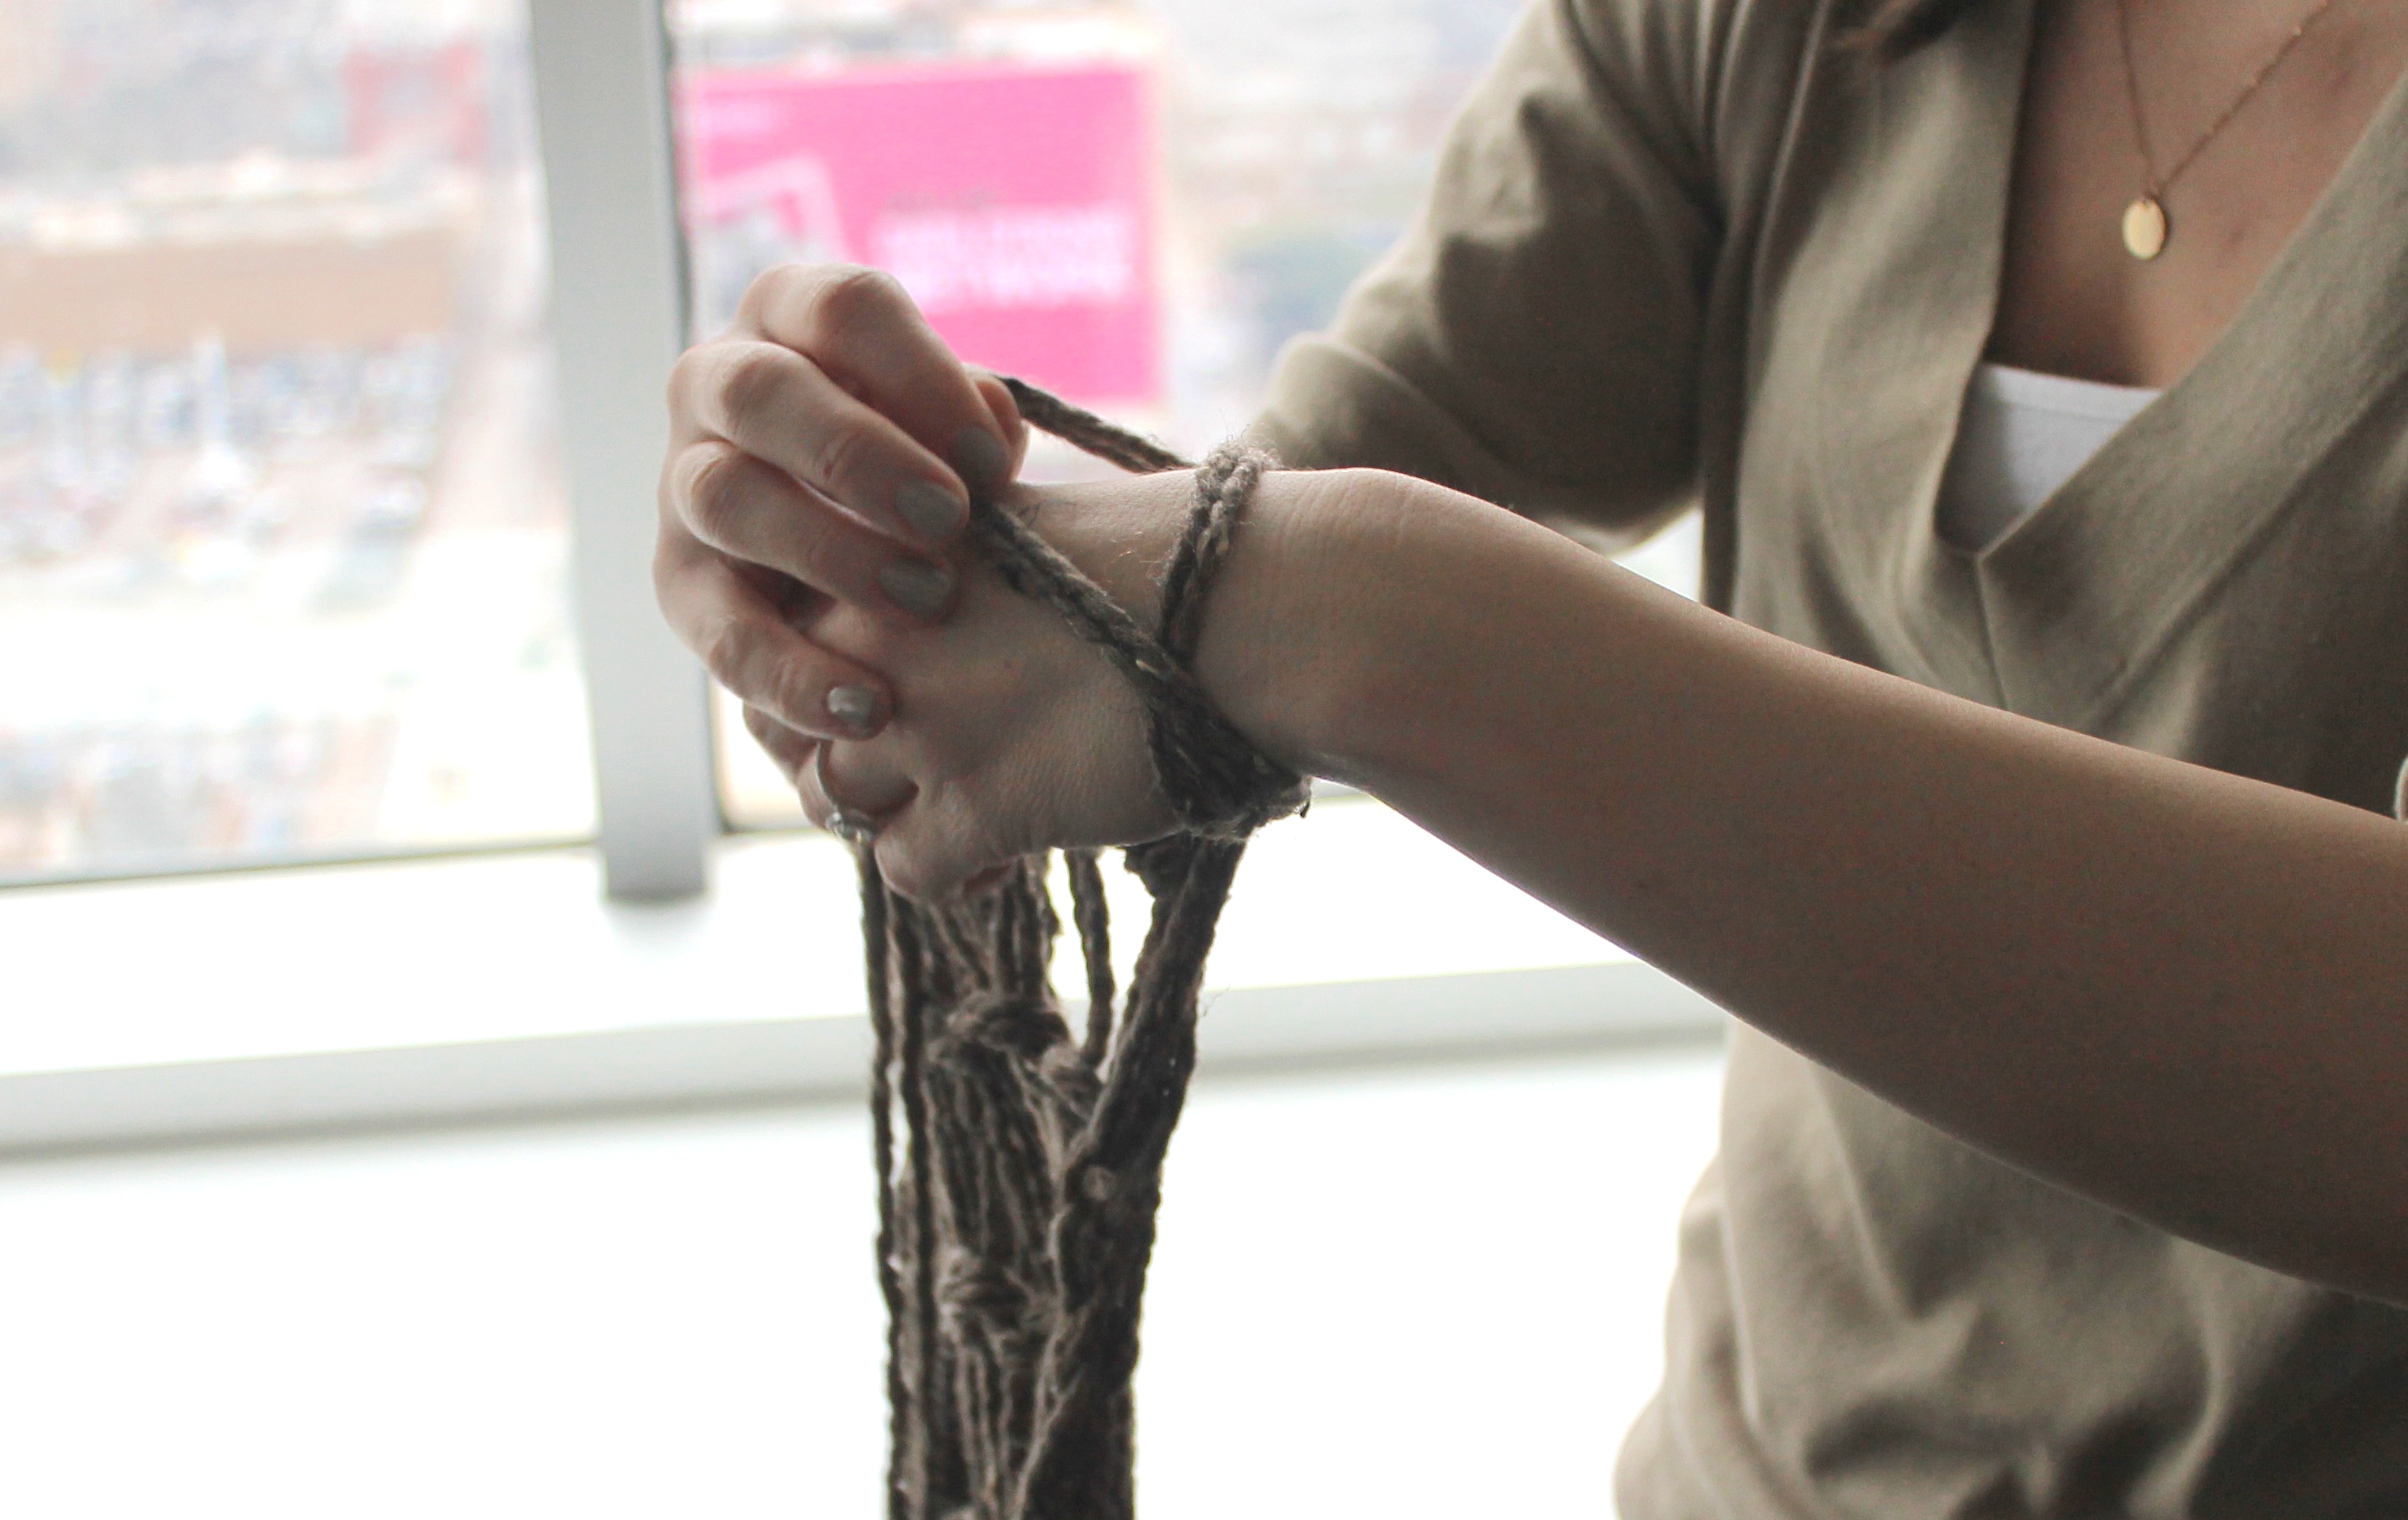
Repeat this once or twice so the knot is firm. Snip the ends of the resulting loop and the rest of the working yarn. Lay the scarf out flat and fold in half, matching up the ends. Stitch the ends together by looping the tail through the open weaves. I did this very quickly, as evidenced by the blurry hand in the photo below, but feel free to go at your own pace, slowpoke.
Tie it off and cut the remaining ends. You’re done! Inexplicably change shirts and wear that neck-warming device proudly, bragging to everyone that you are the next Martha Stewart. Feel pride that you created something using your bare hands. And arms. And yarn.*
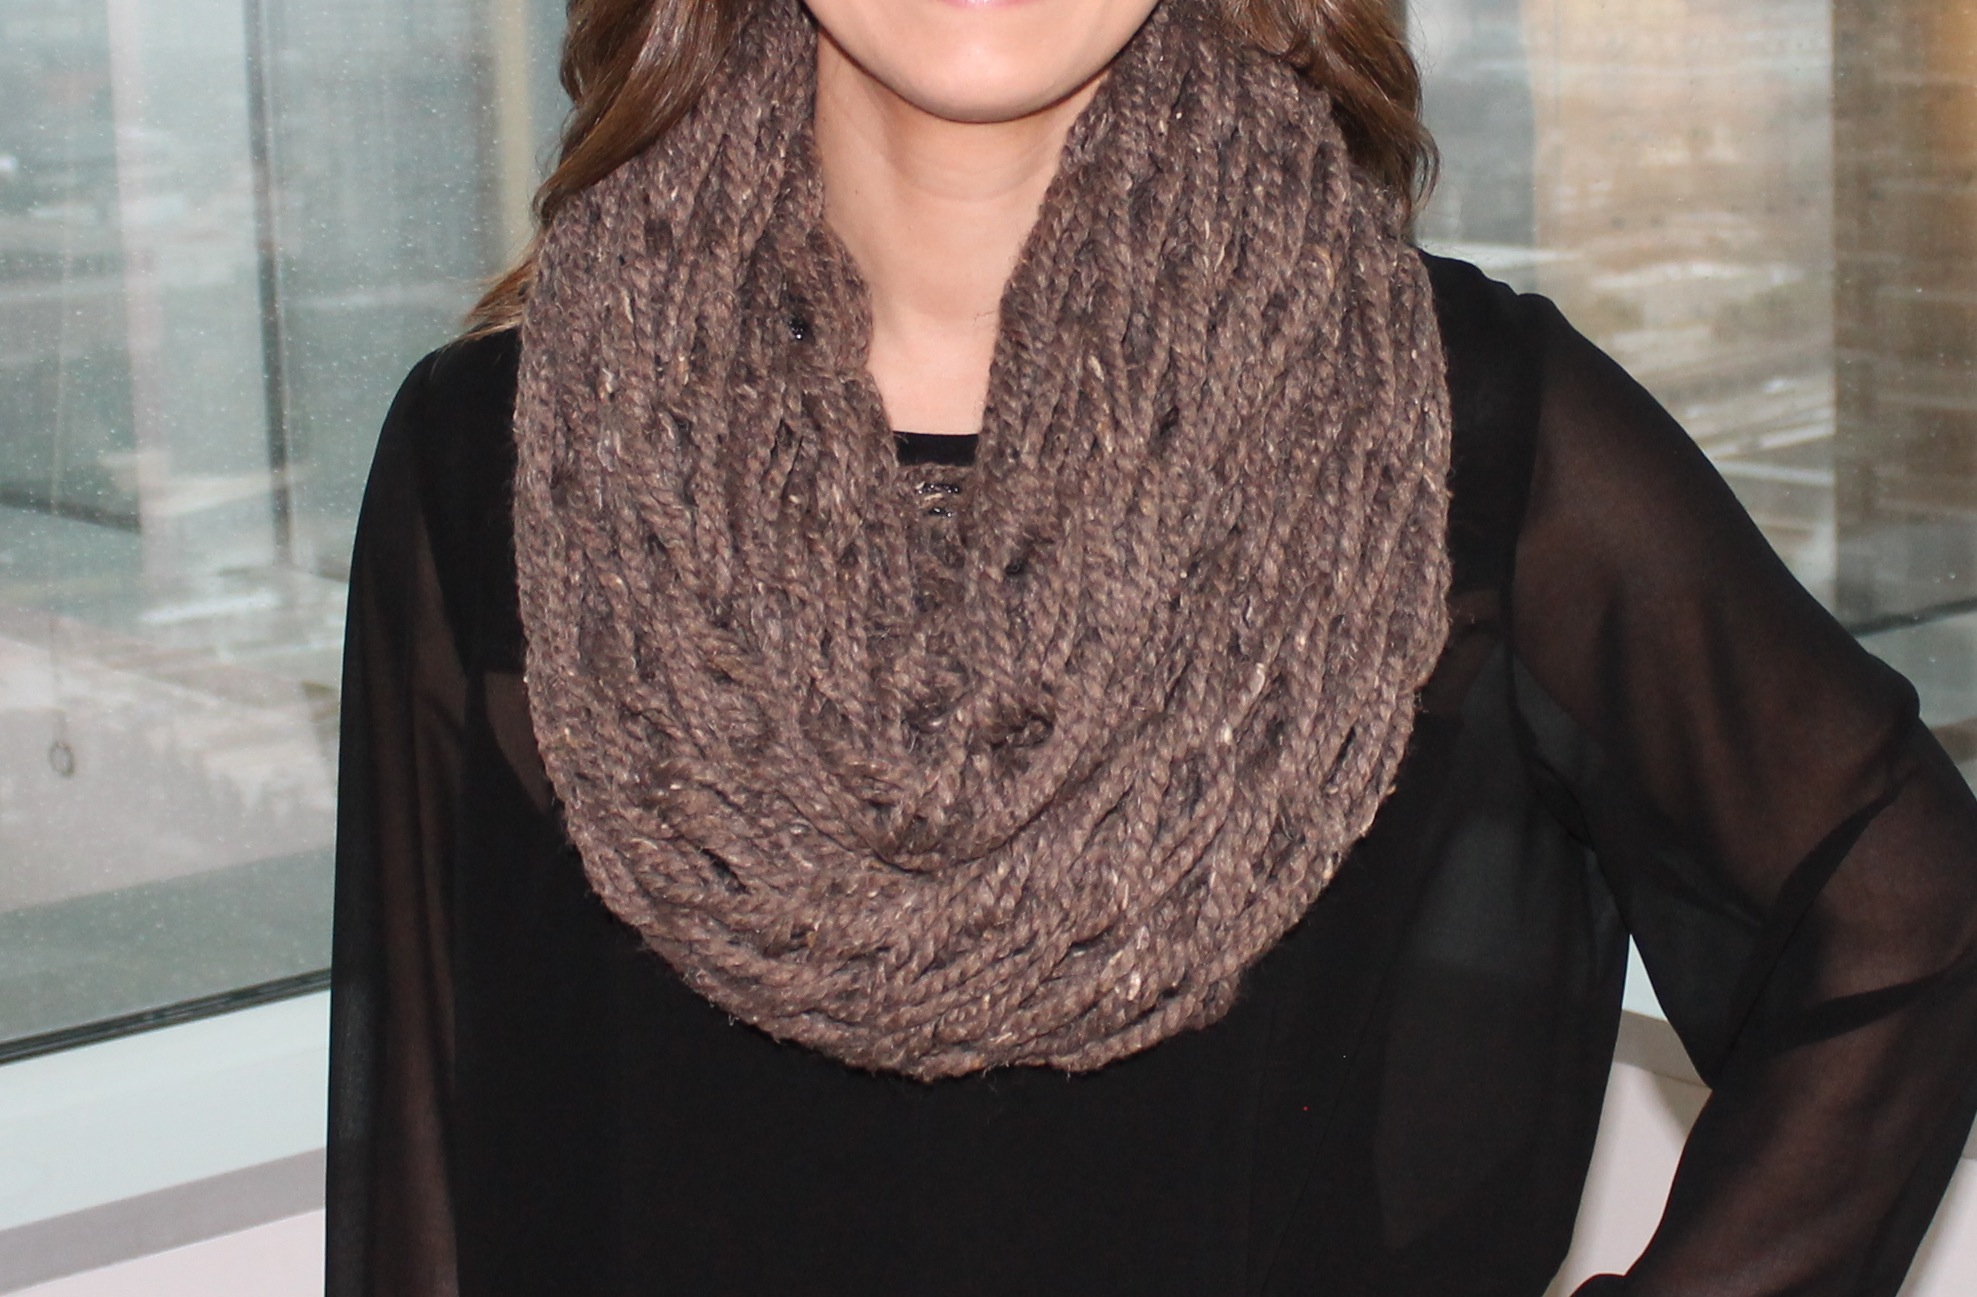
Verdict: I’d say this project was moderately easy, and the outcome not only looks good but is actually useful. Success!
*Alternate directions: Drive to nearest store that sells apparel. Purchase one scarf. Wear it.