
This is part of a regular series in which I attempt (operative word) D.I.Y. projects and bring you, dear reader, the results. The good. The bad. And the hideous. I’ll offer step-by-step instructions so that you can D.I.Y. along with me.
Our last installment of DIY Wednesday was our most successful to date—and you guys responded in kind! I heard wonderful feedback from a number of you, all of whom said you wanted more posts like that one. And I was determined to give that to you, dear readers.
But then I got hungry. Whoopsie.
You see, the editors who bring you D Home are also the editors who bring you D Weddings, and we’re currently hard at work on the Fall/Winter 2015 issue. As such, we’ve been inundated with pictures of beautiful local weddings, including a lot of delicious-looking cakes. A great many of them have been of the “naked” variety—meaning, as any Pinterest addict can tell you, that the exterior of the cake is unfrosted and the layers are left exposed. The resulting effect can be quite stunning, but I wondered just how difficult it would be to replicate this look on your own.
Dallas’ own Emily Allen of Cakewalk Bake Shop was recently featured on 100 Layer Cake explaining her process for making a naked cake. She made it look easy, as professionals often do when explaining their craft, so I decided to give it a shot to see how achievable this really is.
Here’s what you’ll need:
- Cake. For a four-tier cake like the one shown above, you’ll need to make two cakes at least two inches deep. Make these using the recipe of your choice, or, at the risk of getting shunned by your gluten-free/preservative-free/fun-free friends, use box mix.
- Frosting. Here’s the recipe I used, which yielded the yummiest frosting I’ve ever made. Note: For a four-layer cake like mine, I had to make three batches of this frosting.
- Cake pans. I used two 9-inch round pans. If you want your cake to have tiers of different sizes, you’ll want cake pans in a variety of widths.
- Mixer
- Serrated knife
- Offset angled spatula
- Spatula
- Piping bag and tip with large round hole
- Powdered sugar. (You’ll use this for your frosting, but if you want to accent the cake with a dusting, be sure to leave yourself some at the end.)
- Decorative toppers. You can use fruit, a cake topper, cute little plastic toy animals, whatever! You can also accent your cake with flowers (real or fake), but if you use real flowers, you’ll want to get floral tape to wrap around the stems. Unless you just like ingesting toxic pesticides.
If you’re attempting this DIY, I’m going to assume that you know or can figure out how to bake a cake and skip ahead to the assembling and decorating portion of our program. This is to keep from having another Odyssey-length epic like this one, which was — as my dad one of my loyal readers put it — “more complicated than a set of Ikea instructions.” Ahem. (We welcome your feedback! Email me at [email protected]!)
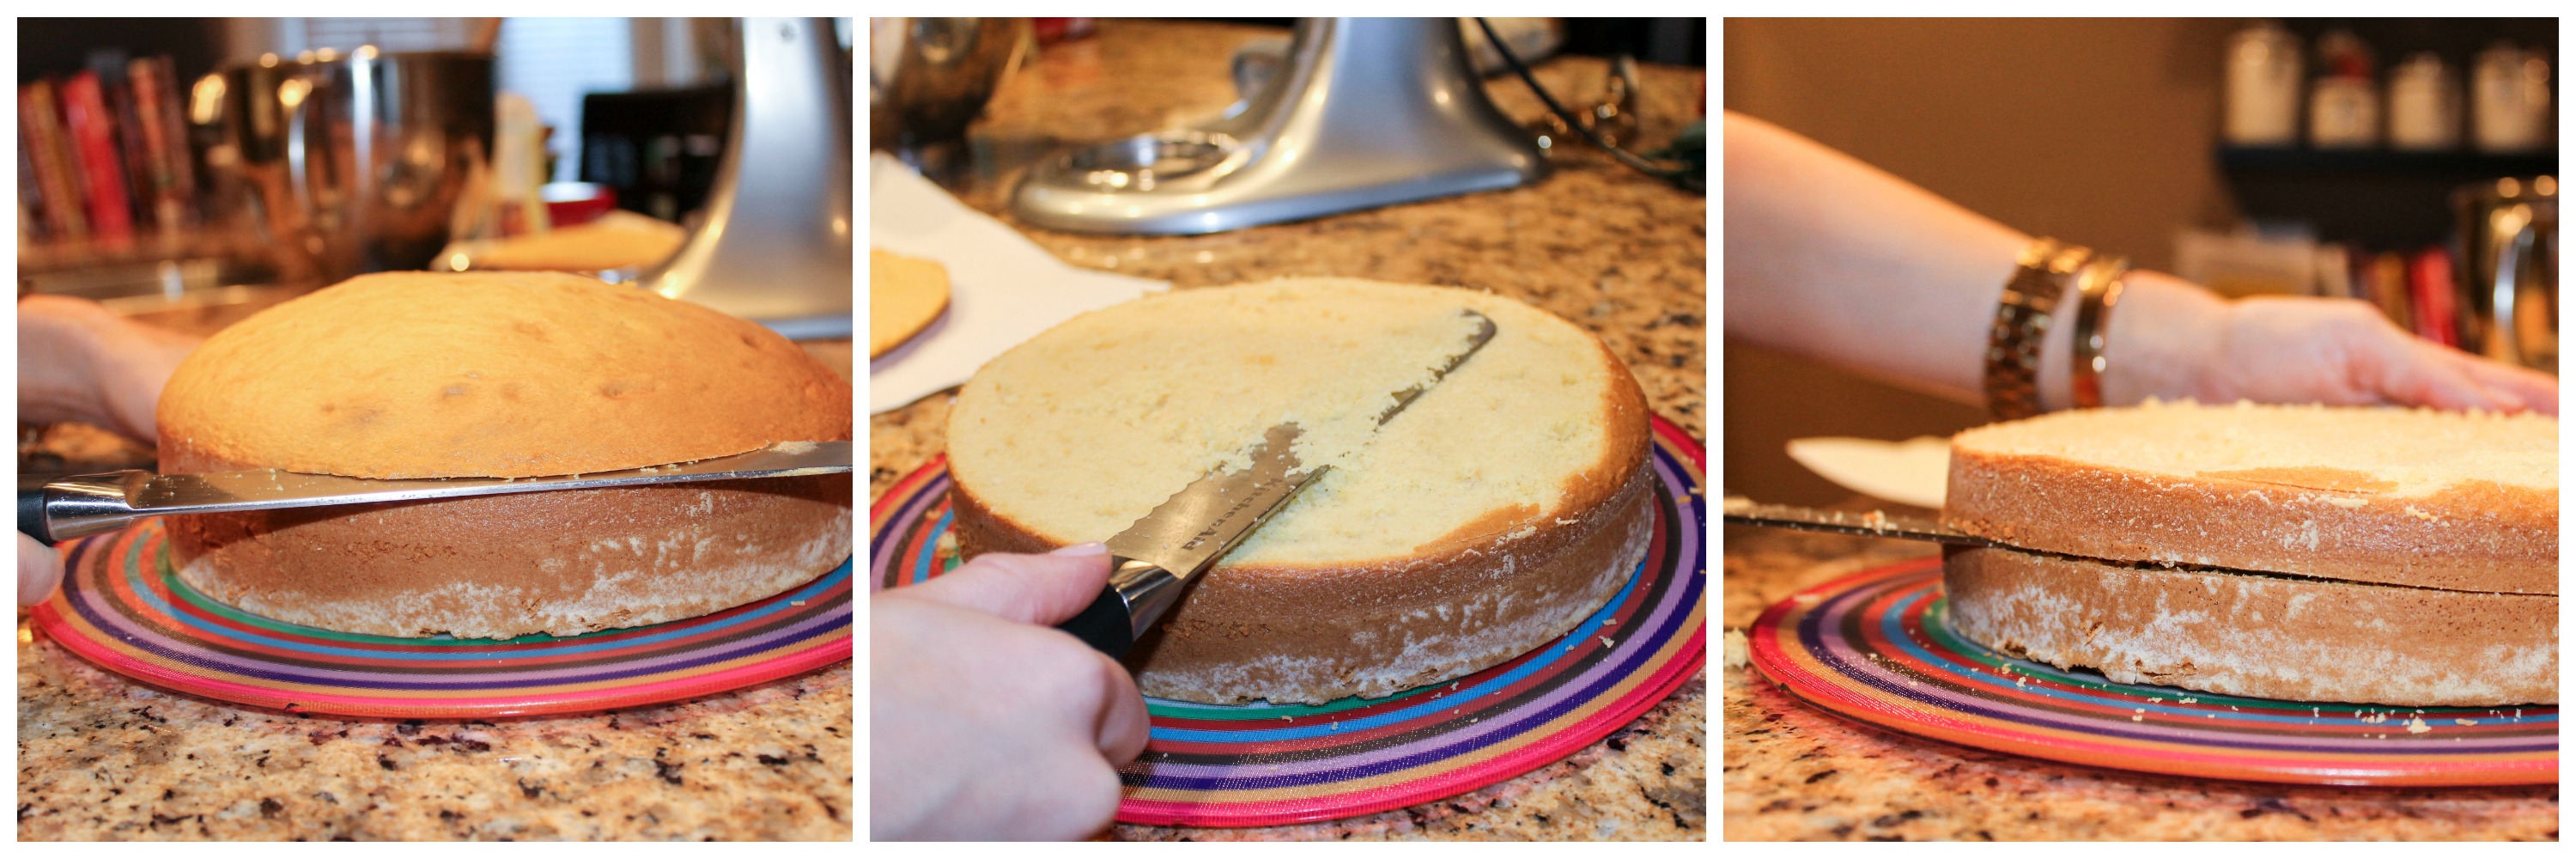
I baked two 9-inch cakes and transferred them to a ho-hum cutting board that I totally didn’t pick because this was going to be photographed, just because it was the one closest to me. Because you’re going to be stacking layers of cake, you want them as flat as possible. So, using my serrated knife, I sawed off the rounded tops. I found it helped to turn the plate as I went, just as Emily said in her post. If your cut isn’t perfectly even, slice off the offending bits until you’re left with a smooth surface. Make sure the cake isn’t poisonous before serving it to loved ones by eating the spongy, delicious discards. Gosh, you’re self-sacrificing.
Next, I cut the cakes in half, again turning the plate as I went, leaving me with four layers in total, each about an inch thick. I transferred the first layer onto the cake plate, making sure to leave the cutting board in the shot to give it some additional screen time.
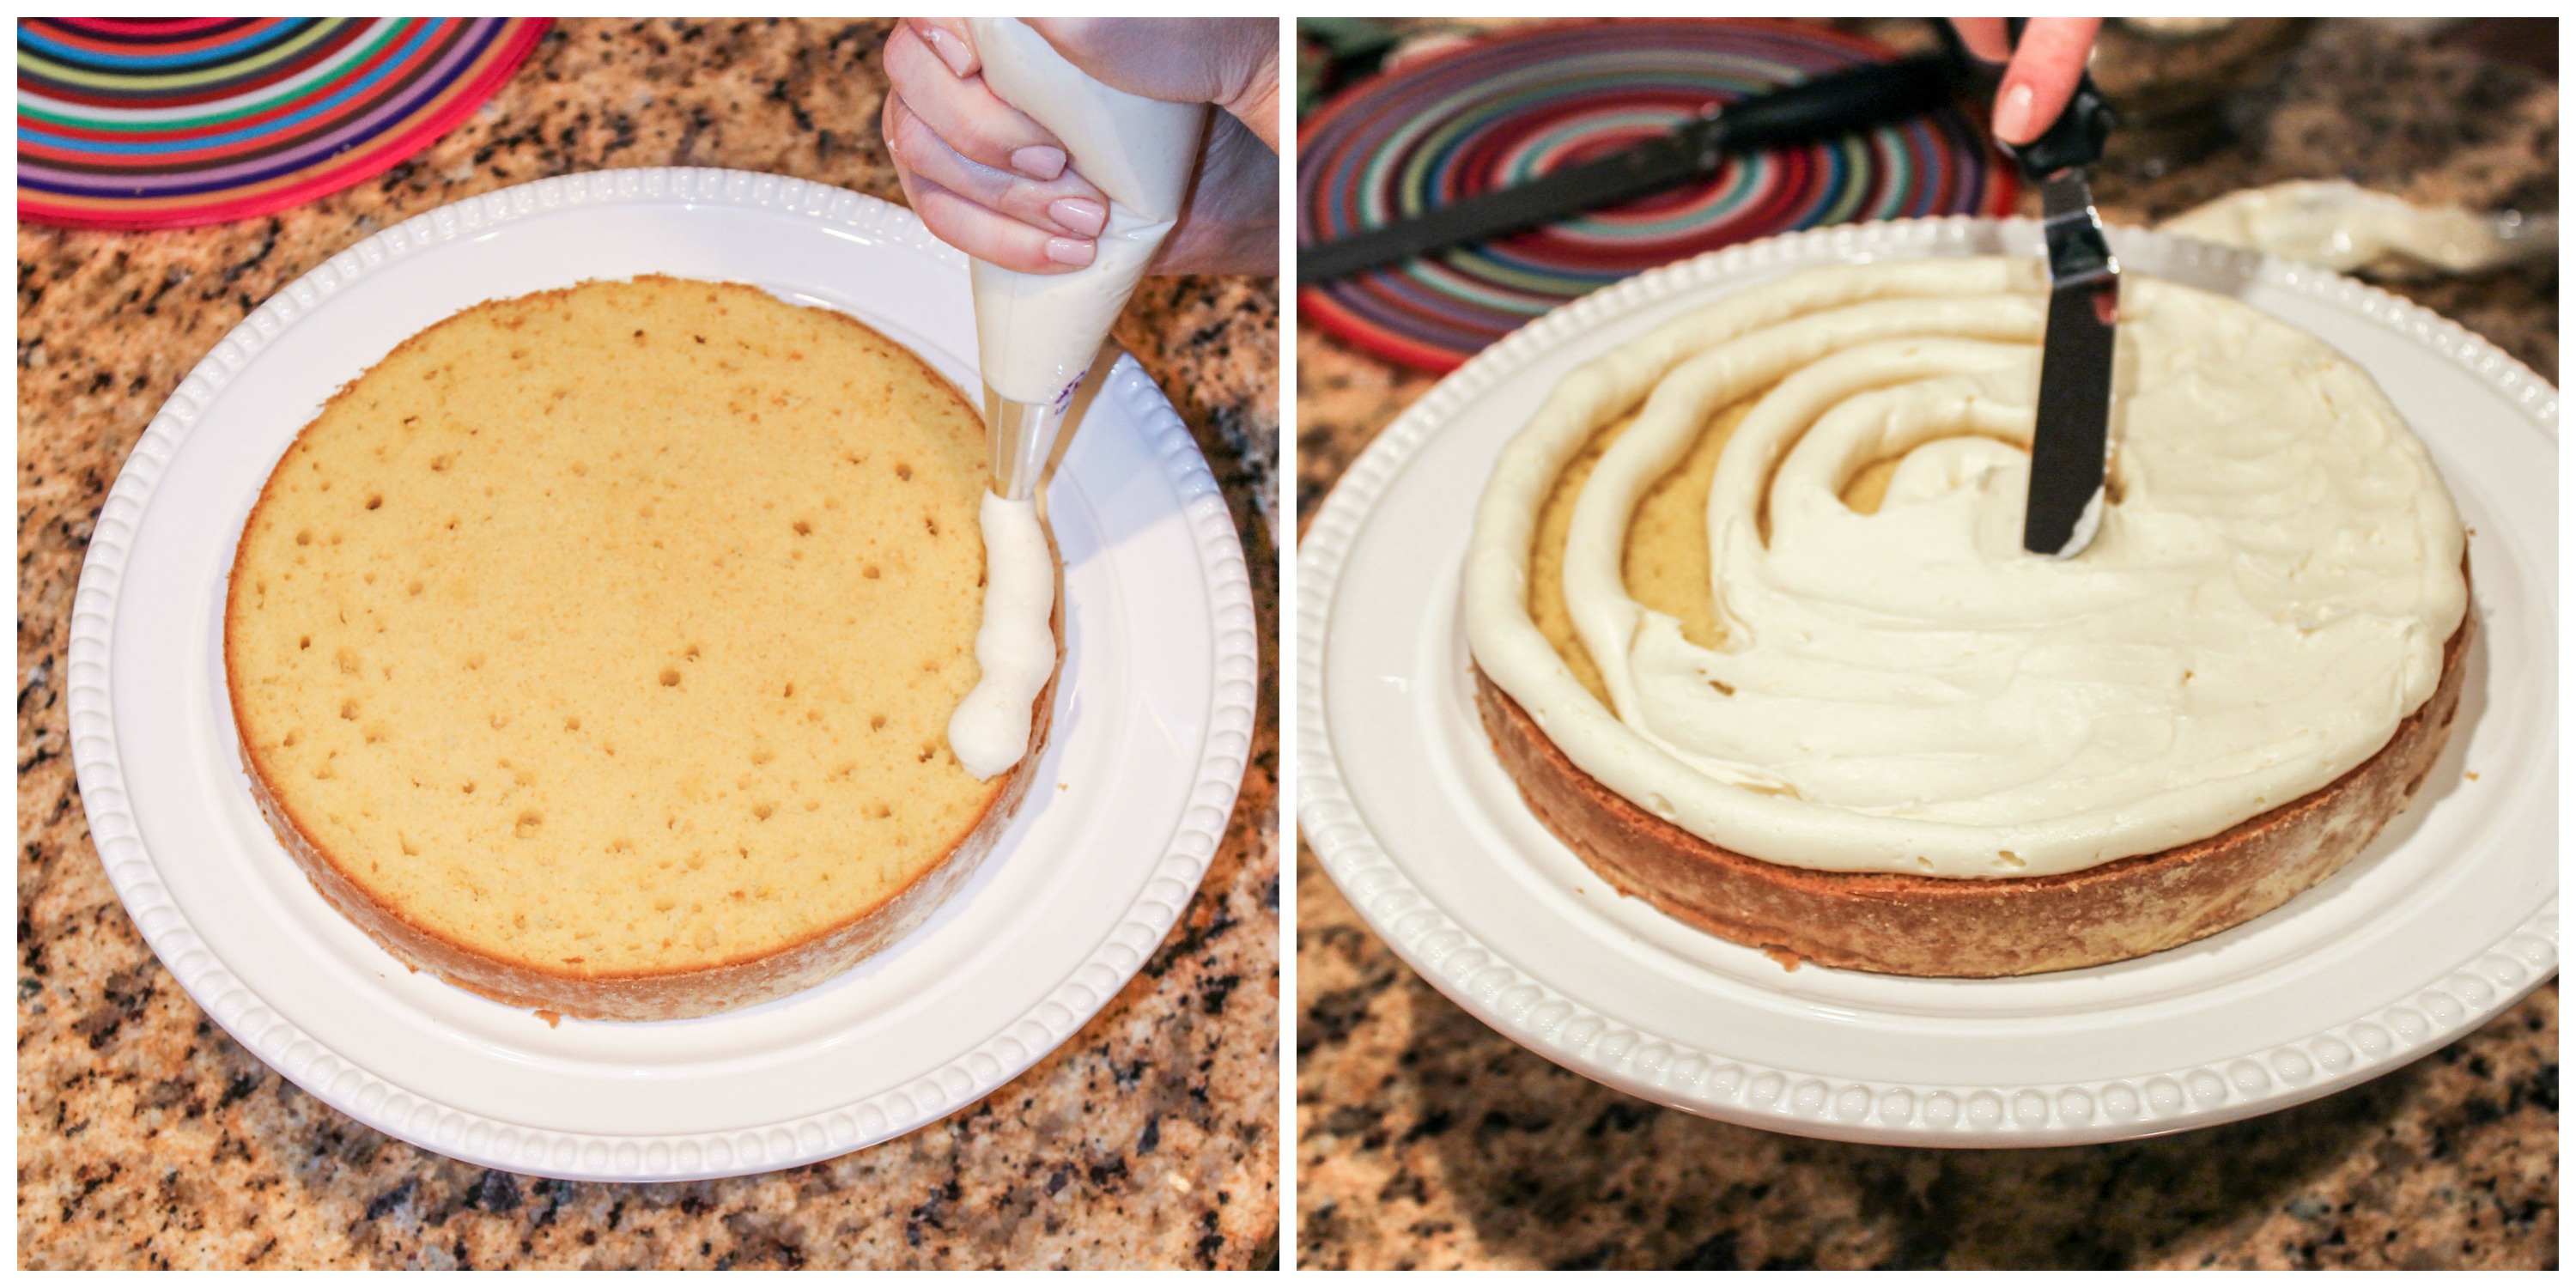
I whipped up a batch of frosting (or you could buy the premade stuff — THAT’S RIGHT I SAID IT) and loaded it into a piping bag outfitted with a tip with a large, round hole. (Don’t have these? Use a gallon-sized Ziplock and just snip off one of the bottom corners.) I piped a ring of icing around the outer rim of the cake then filled in. Using an offset spatula, I blended and smoothed the frosting out.
Now having some experience, I’ll say this: Don’t be afraid to go thick with your frosting. When you place the next cake layer, it will smoosh (technical term) the frosting down a little, so give yourself some smoosh cushion*. As heart-attack-waiting-to-happen-thick as the frosting in the above photos looks, when I put the next cake layer on top, I felt like the icing got too thin, so I packed it on even thicker on subsequent layers. And no, I will not be including nutrition information for this recipe. That is my gift to you.
Also, really hug that edge with your outline, especially if you want the “smeared” look, as I did. You’ll need the frosting to smoosh beyond the edge of the cake in order to have something to smear.
*Optional step: Start a band and name it Smoosh Cushion.
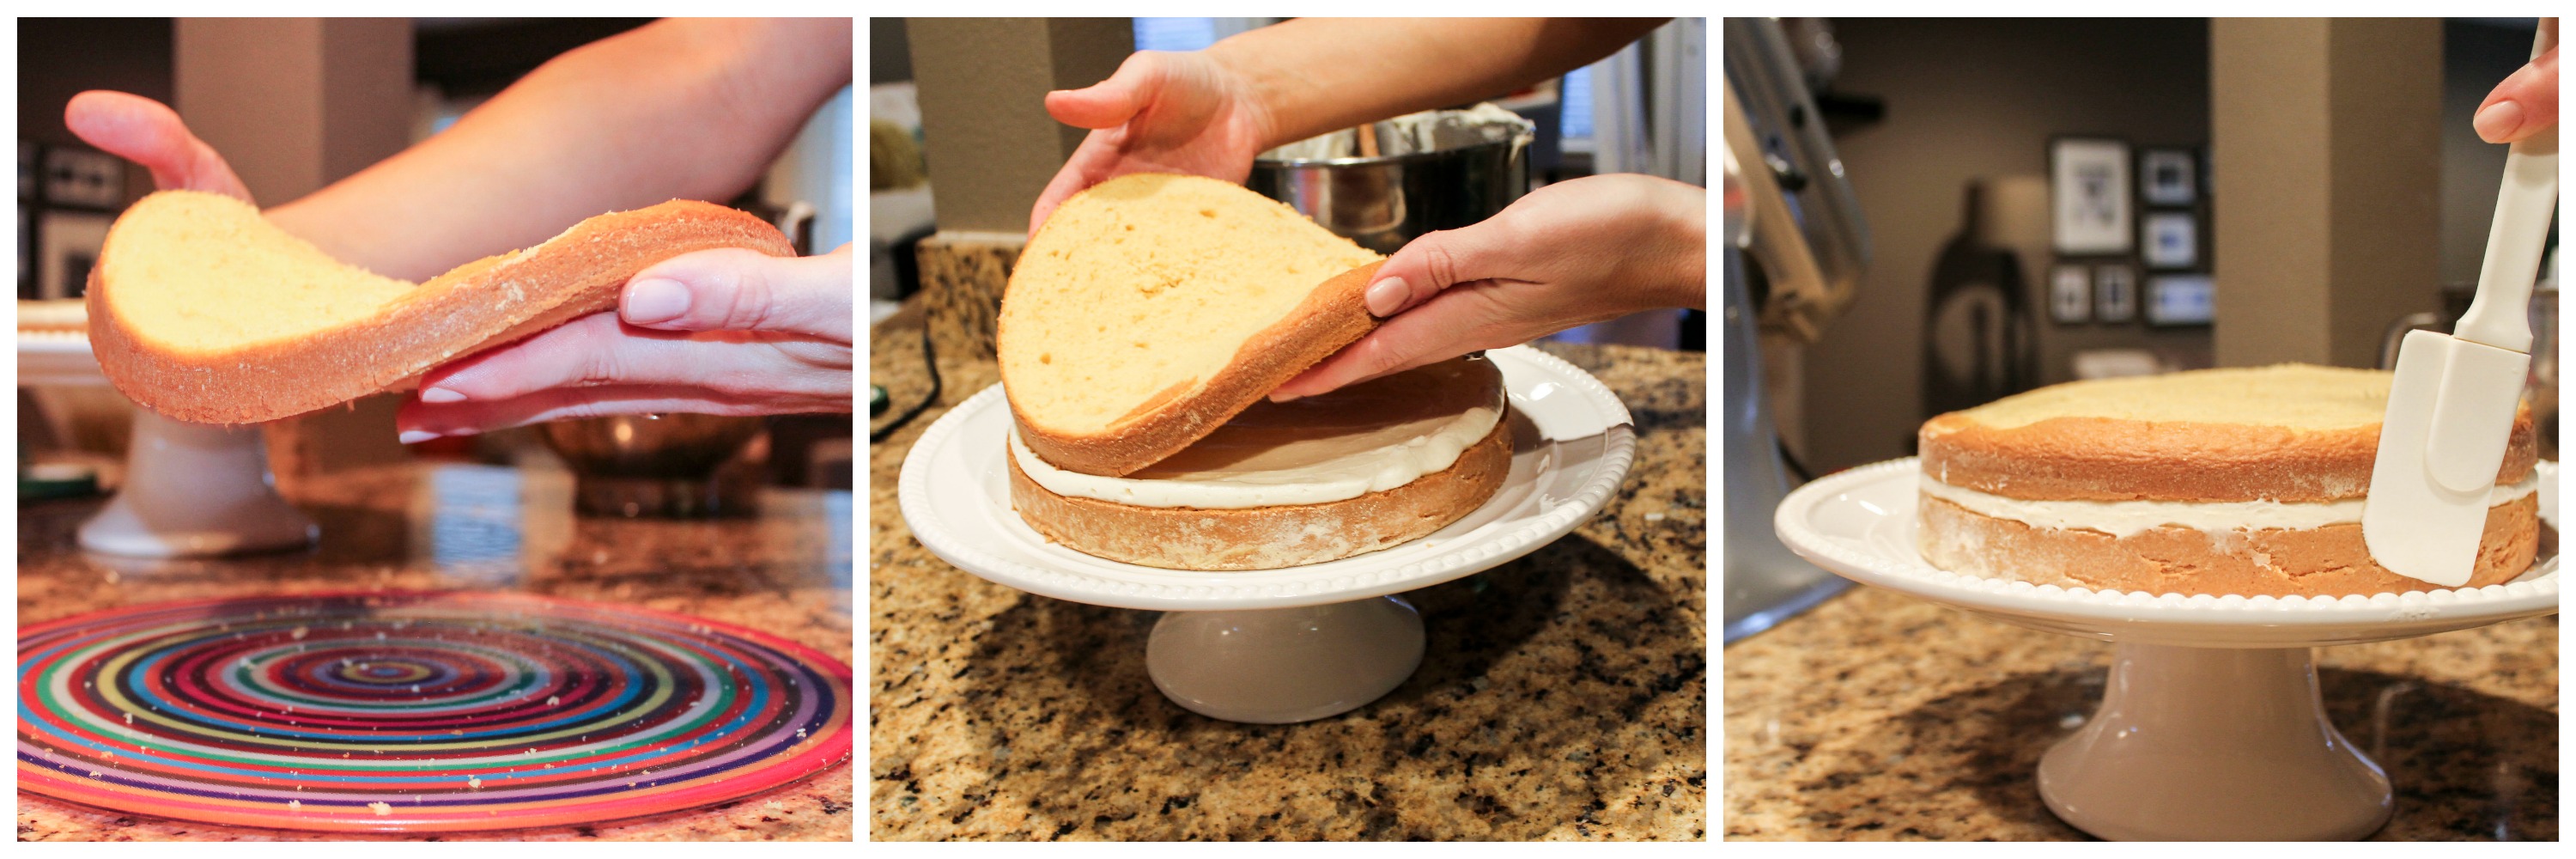
Emily at Cakewalk advised lightly jostling the bottom of the next layer to rid it of any loose crumbs so that they don’t wind up in your frosting. (This is also a good chance for your cute, helpful photographer to get creative with his angles.) Once I’d sufficiently de-crumbed the cake, I set it atop the frosting, making sure to keep the edges in line. Then I took a spatula and scraped off the protruding frosting, giving it the “smeared” effect I mentioned. If your icing didn’t smoosh out far enough, simply pipe more icing in between the cake layers and then smear with the spatula. Yay, workarounds!
Continue layering frosting and cake until you’ve reached your desired number of layers—or until you’re sick of making frosting. Sidenote: I used to think I wouldn’t enjoy naked cake because its nudity would leave my love for frosting unsatisfied. As I whipped up batch number three of frosting, I realized I no longer need to be concerned about this.
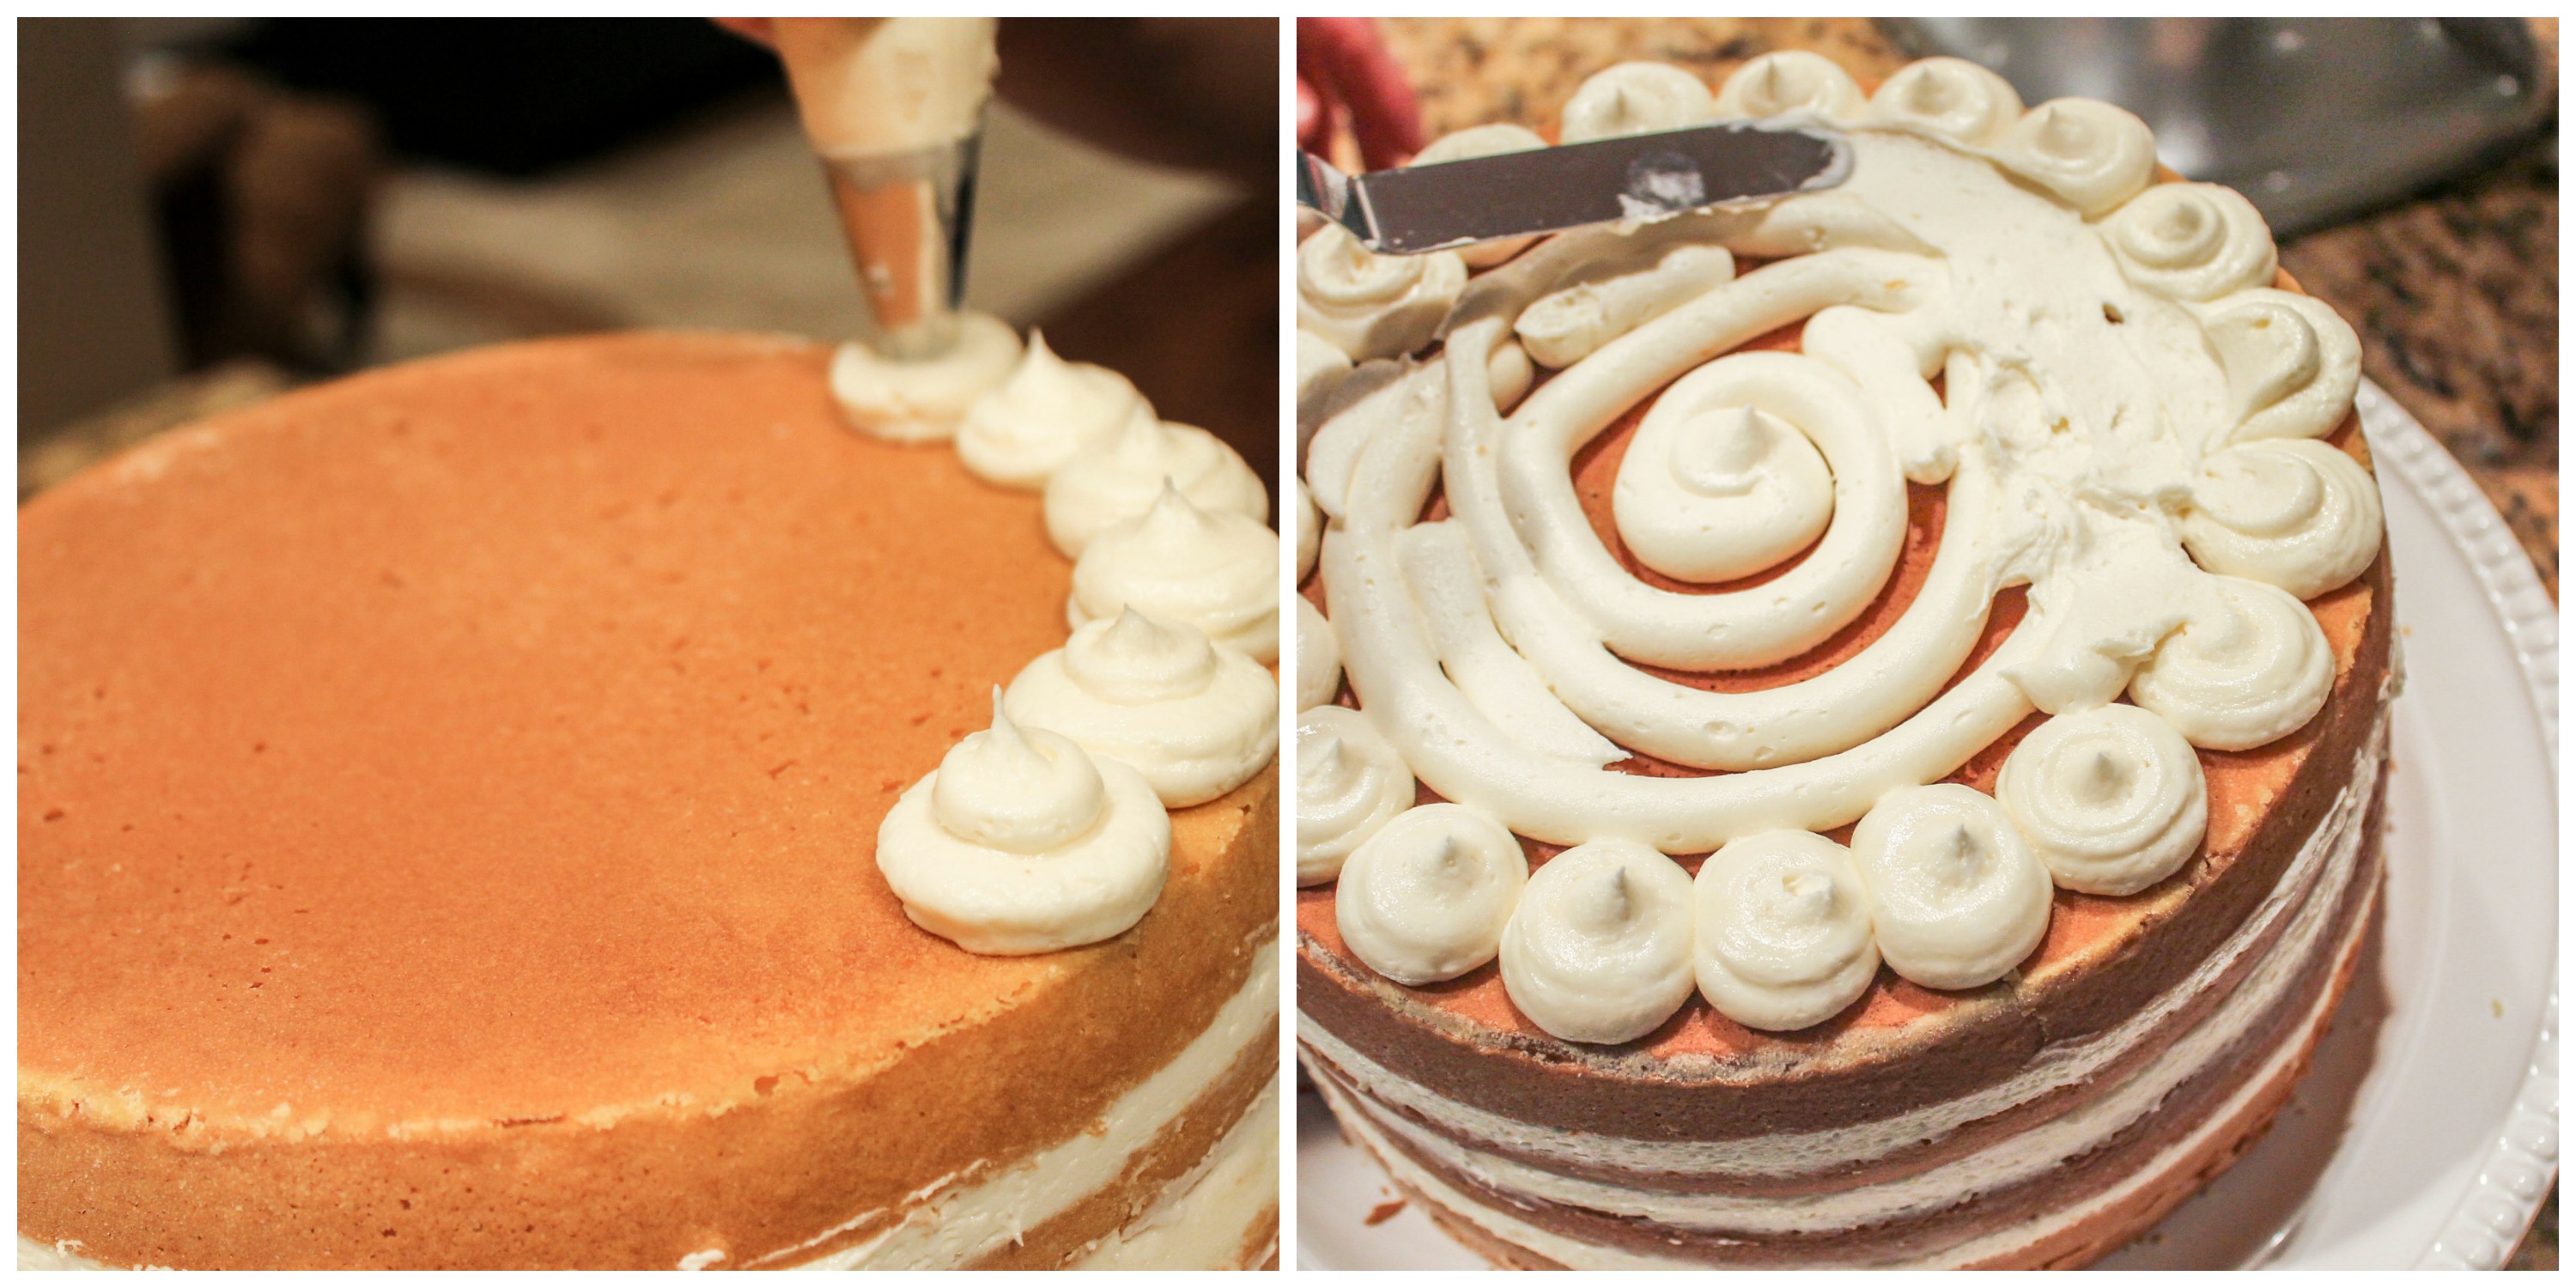
When you’re ready to finish your creation, invert one of the bottom layers of cake and use this as your top layer so that it has a nice, evenly browned appearance. You could really do whatever you wanted as far as decorating the top—leave it bare, dust it with powdered sugar, create a pointillism-style self portrait in sprinkles…however the spirit moves you. I liked the scalloped edging of Emily’s example, so I followed her instructions, creating dots of icing around the edge of the cake, then filling in and blending together. (A top of solid dots would actually be adorable as well.)

You can style your cake a number of different ways. I tried two different options to give you some ideas. First, I arranged some fresh berries on top for a look very suited to Fourth of July fans or people who only feel okay about eating dessert when it involves fruit. I tossed some powdered sugar along the outside because this cake didn’t already contain enough.
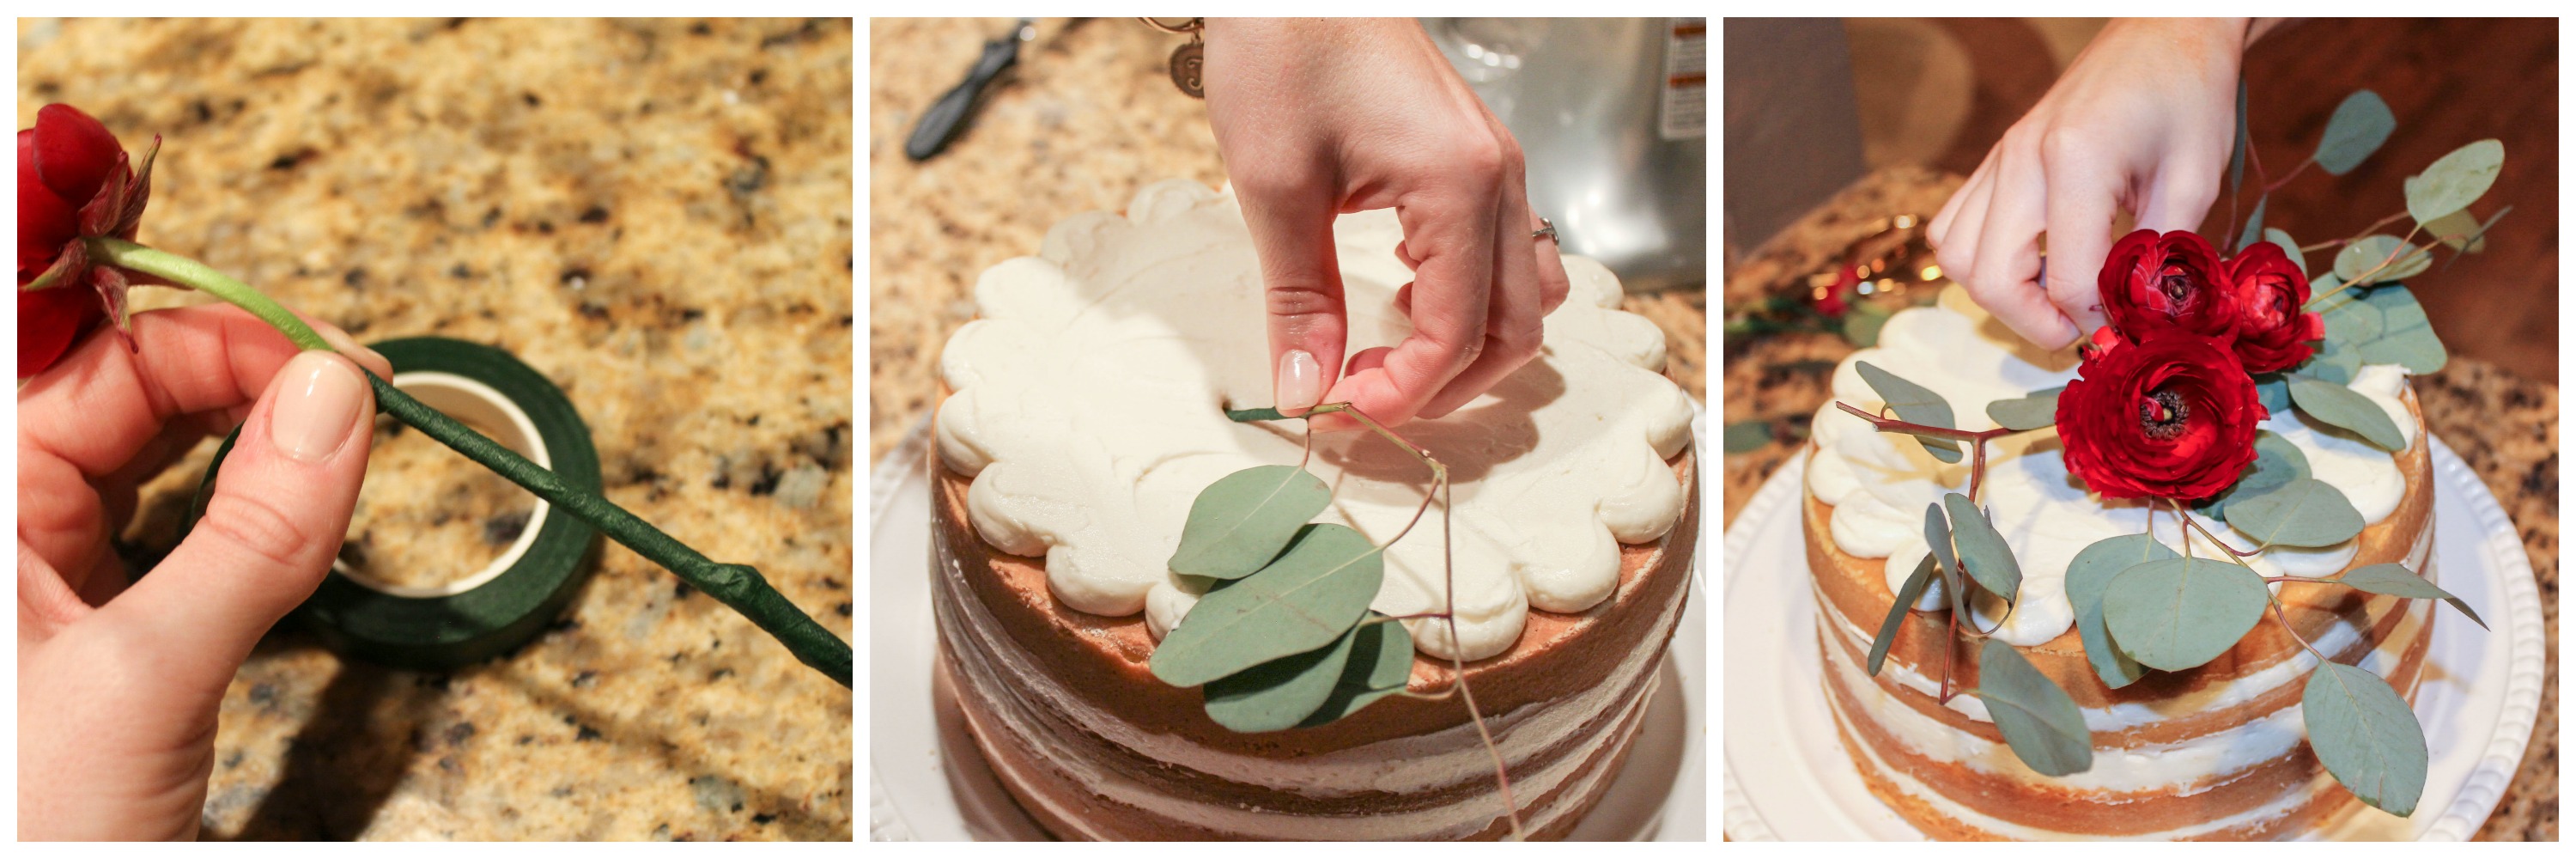
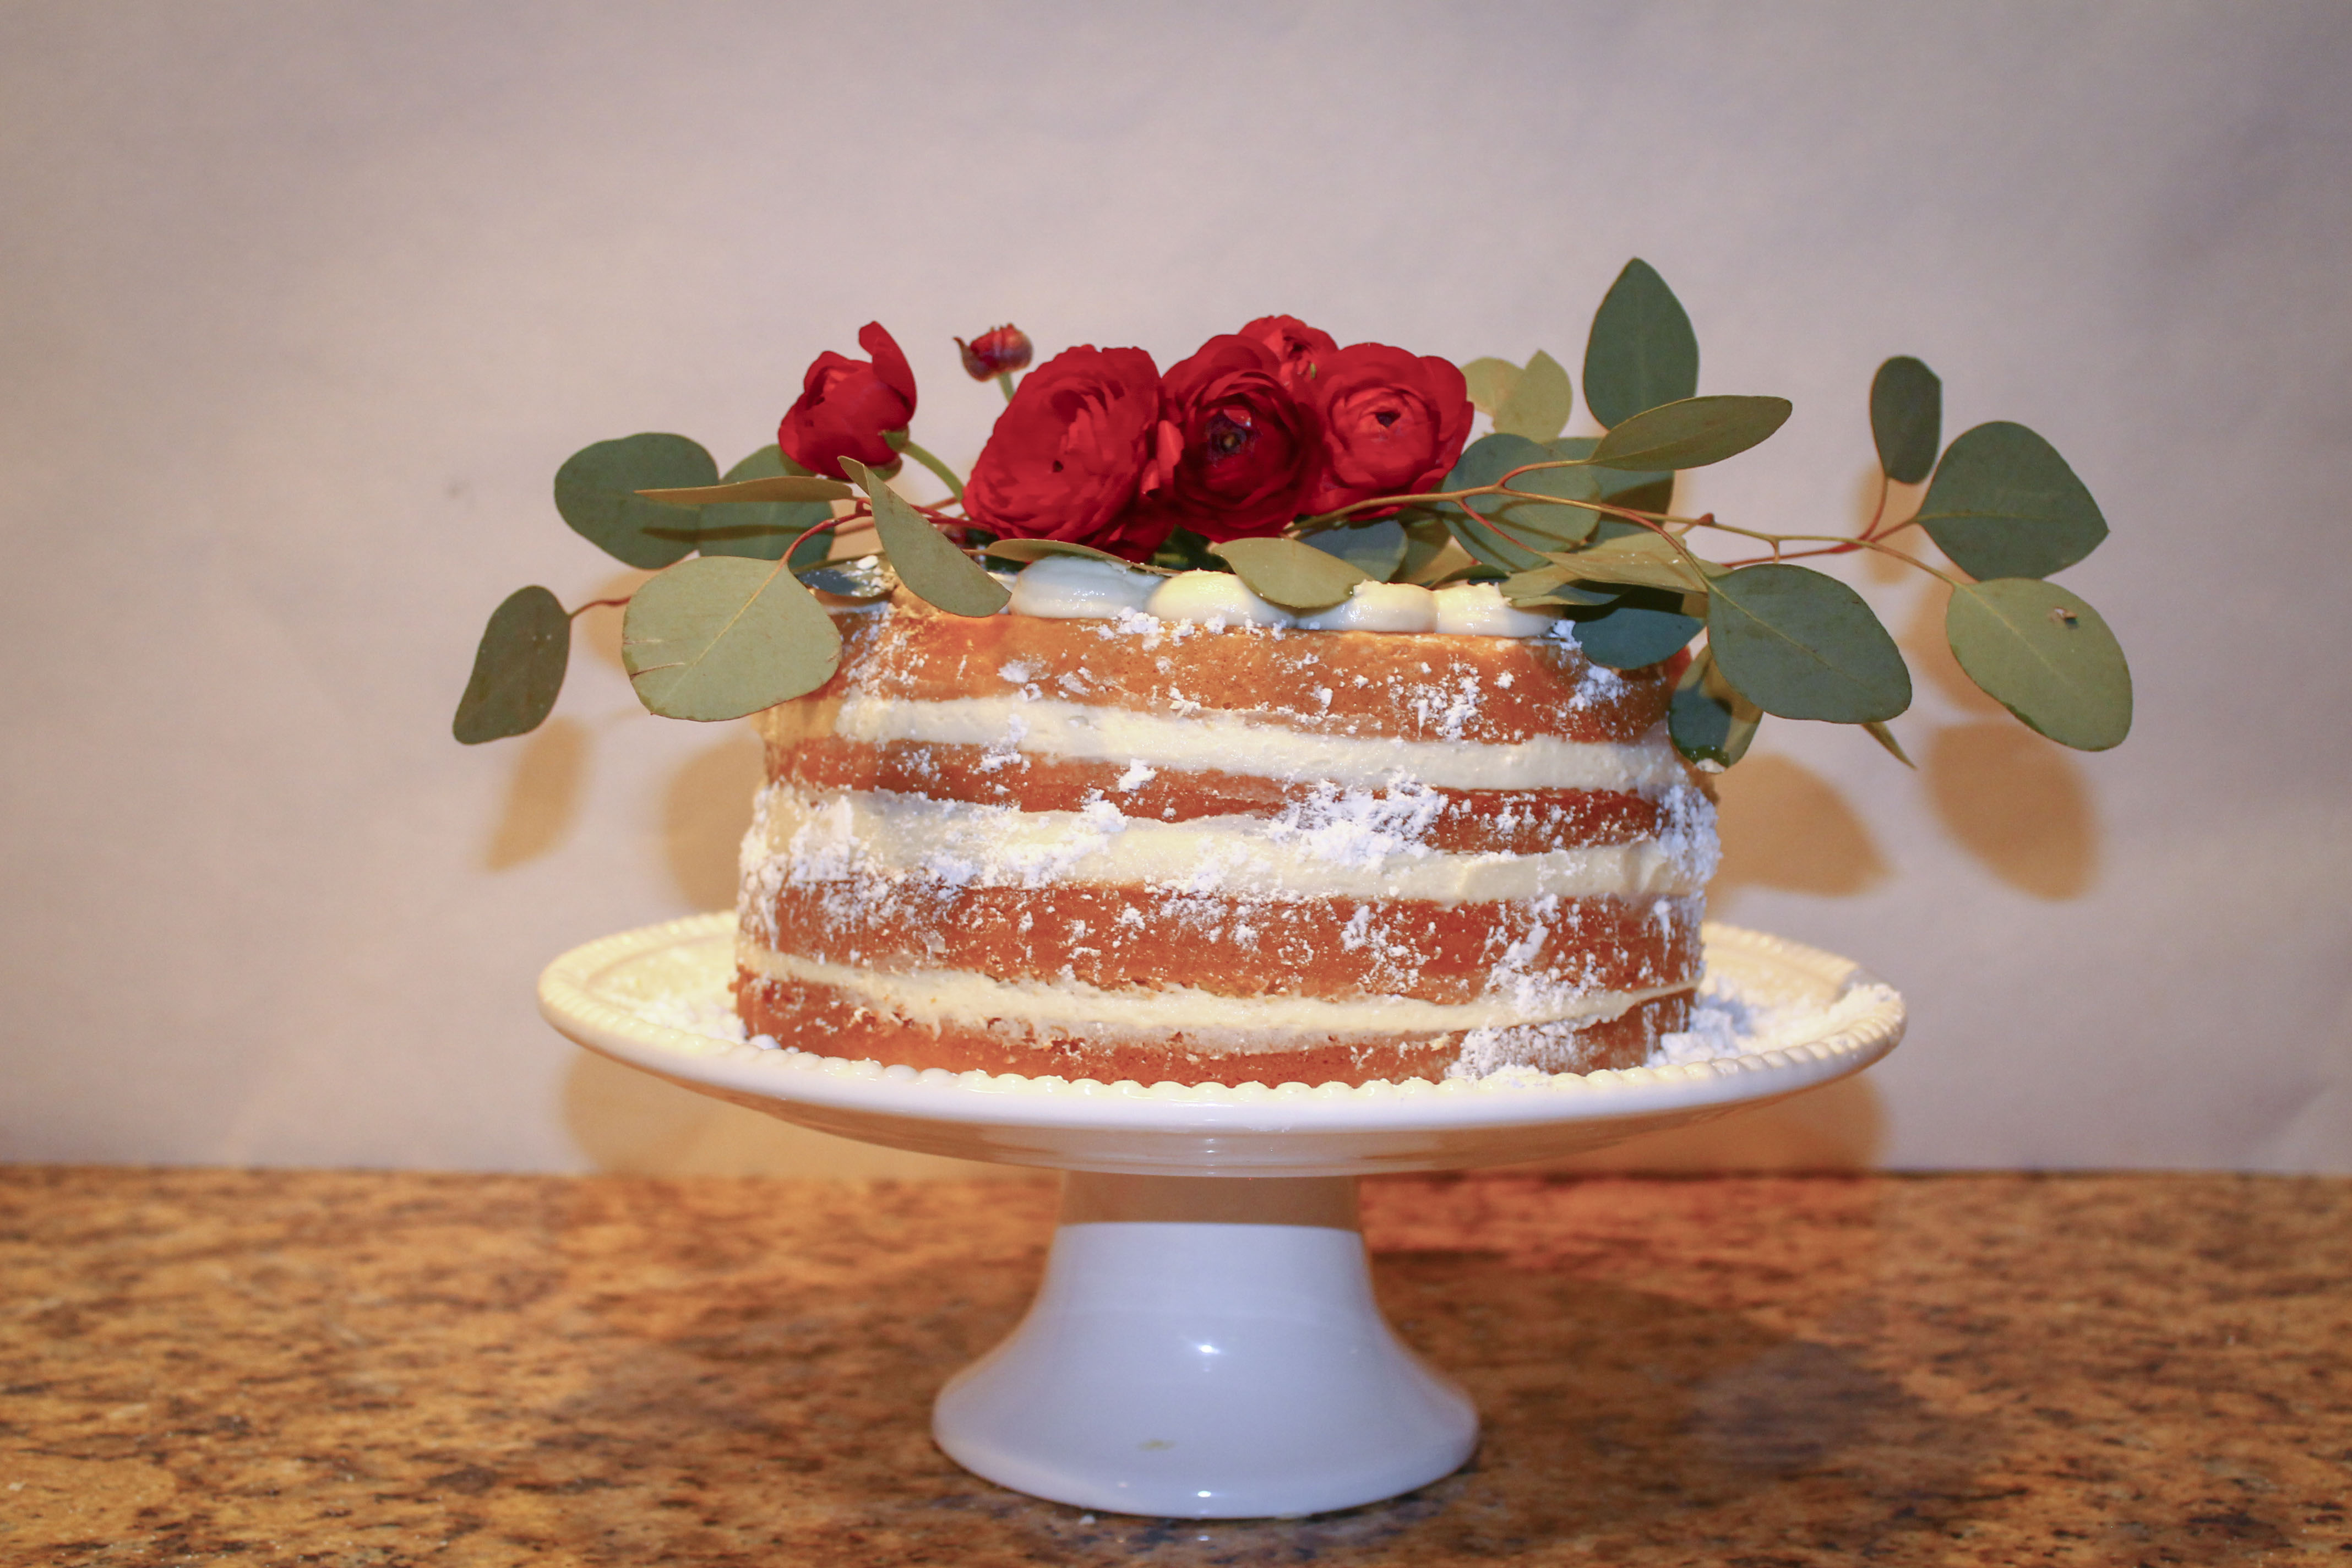
For look number two, I wrapped the stems of some seeded eucalyptus branches and ranunculus with floral tape and carefully inserted them into the cake. I don’t really know how flowers on cake became a thing, but it sure does look pretty. Maybe I will start putting flowers on more foods. (Lasagna with Larkspur, anyone?)
Verdict: Making a naked cake wasn’t that much different from making a normal layer cake. While Emily made it look effortless, and my kitchen ended up looking like a scene from Scarface, I was happy with the results nonetheless. Success!